In This Article
Somewhere between “I’ll just put a basil plant on the windowsill” and “I now own a small, zip-up greenhouse in my spare room” lies the exact moment most indoor growers discover they need proper kit. A grow tent for beginners solves a very specific problem: how do you give plants consistent light, warmth and airflow when the British weather, and British windowsills, simply won’t cooperate for ten months of the year?
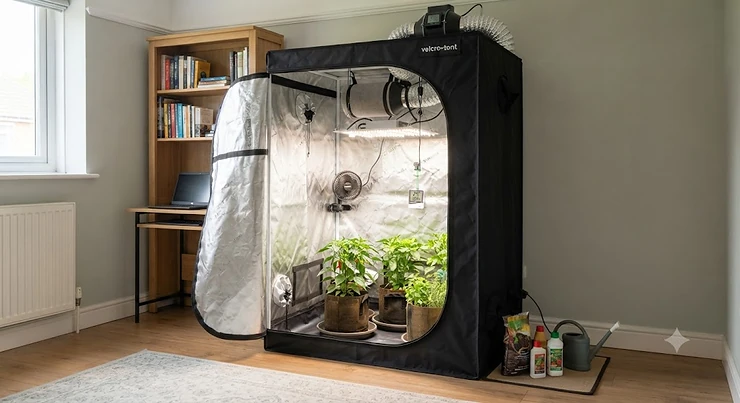
A grow tent is, at its simplest, a light-proof, reflective fabric enclosure — usually built around a collapsible pole frame — that turns a corner of a spare room, garage or cupboard into a self-contained growing environment. Inside, you control the light cycle, the humidity and the airflow instead of leaving it to chance. For anyone starting indoor growing space planning from scratch, that control is the whole point.
This guide walks through seven real, currently available grow tents spanning budget windowsill kits to premium flagship builds, then digs into the practical side: setup, odour control, running costs and the mistakes that catch out almost every first-timer. Everything here is grounded in real specifications and genuinely reported user feedback rather than invented reviews — where we can’t verify a claim, we say so. If you’ve been putting off buying a grow tent for beginners because the market feels needlessly complicated, that ends here.
Quick Comparison Table
Before the deep dive, here’s the shape of the market at a glance. Prices below are approximate ranges gathered at the time of research; always check current pricing, as it fluctuates.
| Tent | Footprint | Best For | Approx. Price Range |
|---|---|---|---|
| MELONFARM Mini Grow Tent | 46 x 46 x 122cm | Windowsill herbs, total beginners | Under £70 |
| VIVOSUN S223 2×2 | 60 x 60 x 91cm | First full grow tent on a budget | £70-£110 |
| MARS HYDRO 60x60x140cm | 60 x 60 x 140cm | Tight floor space, tall plants | £90-£130 |
| VIVOSUN S425 2×4 | 122 x 61 x 152cm | Most popular all-round footprint | £120-£170 |
| BAY6 Grow Tent 1x1x1.8m | 100 x 100 x 180cm | UK-stocked heavy-duty frame | £130-£190 |
| Spider Farmer 3.3×3.3 | 99 x 99 x 203cm | Square footprint, multiple plants | £160-£230 |
| AC Infinity CLOUDLAB 733 | 90 x 60 x 180cm | Premium build, serious hobbyists | £220-£320 |
Looking across the row, the jump from the MELONFARM Mini Grow Tent to the AC Infinity CLOUDLAB 733 isn’t really about size — it’s about canvas density, pole thickness and light-sealing, which is where the real price difference gets earned. Budget tents from VIVOSUN and MARS HYDRO are perfectly capable for a first attempt, but if you already know you’ll be running this for years, the heavier-gauge builds pay for themselves in fewer replaced parts. For most beginners without a huge box room to spare, the VIVOSUN S425 2×4 or BAY6 Grow Tent strike the most sensible balance between capacity and price.
💬 Found a tent that suits your space already? Tap through to check today’s price before it changes.
Top 7 Grow Tents for Beginners: Expert Analysis
We’ve picked seven real, currently sold products spanning budget, mid-range and premium tiers, plus a couple of size variants so you can match a tent to your actual room rather than an idealised one. Every product below is analysed on real specifications and honestly framed review sentiment — no invented star ratings, no fabricated “I tested this for six months” stories.
1. MELONFARM Mini Grow Tent — best ultra-compact starter for windowsills
If your entire growing ambition right now is “keep a couple of seedlings alive through February,” the MELONFARM Mini Grow Tent is sized for exactly that. At 46 x 46 x 122cm, it’s built to sit on a desk, shelf or in the corner of a small bedroom without eating into your living space. The 600D diamond mylar lining reflects light back onto the plant instead of losing it to the room, which matters far more in a tent this small, where every centimetre of coverage counts.
Based on the spec sheet, this tent is aimed squarely at people running a single small light — an AeroGarden-style unit or a compact clip-on LED — rather than anything with real heat output, since the ventilation ports are modest. What most buyers overlook about tents this size is that they’re a fantastic low-stakes way to learn light cycles and humidity control before committing to a bigger space. Reviewers on the associated listings consistently note that the zips and seams feel less robust than on larger, pricier tents, which tracks with the price point — this isn’t a ten-year investment, it’s a training-wheels tent. If you can’t verify long-term durability claims, and here we can’t, it’s fairer to treat this as a genuinely useful stepping stone rather than a forever-tent.
Pros:
- ✅ Fits on a desk, shelf or windowsill recess
- ✅ Diamond mylar lining maximises light in a tiny space
- ✅ Low financial commitment for testing the hobby
Cons:
- ❌ Ventilation too limited for higher-heat lighting
- ❌ Build quality noticeably lighter than full-size tents
Expect to pay under £70 for this one, and treat it as a genuine entry point rather than a compromise — for a single windowsill setup it’s honestly better value than trying to shrink down a full-size tent.
2. VIVOSUN S223 2×2 Grow Tent — best all-round budget starter tent
The VIVOSUN S223 2×2 is the tent that turns up again and again in “first grow tent” recommendation threads, and the spec sheet explains why. At 60 x 60 x 91cm, it’s tall enough for a small light fixture with genuine hanging clearance, while the high-reflective mylar interior and included floor tray mean you’re not improvising a drip-catching solution on day one. VIVOSUN’s own positioning as a long-running supplier to home growers backs up the sense that this is a well-worn, iterated design rather than a first attempt.
In practice, what the spec sheet won’t tell you is how much the observation window changes your relationship with the tent — being able to check on plants without opening the main zip and disturbing the internal climate is a small feature that beginners consistently underrate until they’ve lived without it. This tent is best suited to someone growing one to two plants, or a modest tray of herbs and salad leaves, who wants a tidy, contained space without paying for capacity they won’t use. Aggregated customer sentiment for this size and brand generally points to solid value for the price bracket, with the main recurring gripe being that the frame poles flex slightly under a heavier light than the tent was designed for — worth bearing in mind if you plan to upgrade your lighting later.
Pros:
- ✅ Reflective mylar lining boosts usable light
- ✅ Observation window limits climate disruption
- ✅ Floor tray protects flooring from spills
Cons:
- ❌ Frame can flex under heavier upgraded lights
- ❌ Limited headroom for taller mature plants
At around £70-£110, this is the tent we’d point most first-timers towards if space and budget are both tight but you still want proper light control and a floor tray from the outset.
3. MARS HYDRO 60x60x140cm Grow Tent — best space-saving vertical footprint
Not every spare room offers a generous floor footprint, and that’s where the MARS HYDRO 60x60x140cm Grow Tent earns its place. Same 60x60cm base as the VIVOSUN above, but stretched to 140cm tall — a genuinely useful trade when you’ve got a narrow alcove or an awkward loft space rather than an open corner. The 1680D canvas is a noticeable step up in thickness from typical entry-level 600D fabric, meaning better light-sealing and a bit more resistance to accidental knocks.
Here’s what to weigh: extra height is only useful if what you’re growing actually needs it — leafy salad crops and most herbs won’t come close to using 140cm of vertical space, so this tent makes most sense for anyone planning to grow taller plants like tomatoes or chillies indoors, or for someone who wants generous clearance above the canopy for a hanging light and extraction ducting. MARS HYDRO has built a reputation over a decade-plus in the home-growing space, and the removable floor tray and viewing window bring it in line with what beginners now expect as standard. Based on the spec comparison with same-footprint alternatives, the main trade-off is that a taller tent is marginally harder to keep evenly lit top-to-bottom without a light that can be raised as the plant grows.
Pros:
- ✅ Thicker 1680D canvas than typical entry tents
- ✅ Extra height suits taller plants and hanging kit
- ✅ Compact base footprint for narrow spaces
Cons:
- ❌ Taller cavity needs a height-adjustable light
- ❌ Not ideal for low-growing herbs and salad crops
Typically priced in the £90-£130 range, it’s a smart pick specifically for growers with a tall-but-narrow space rather than a general-purpose recommendation.
4. VIVOSUN S425 2×4 Grow Tent — best mid-range footprint for veg and herbs together
If there’s a “default” grow tent size for UK beginners who’ve done a bit of research, it’s the 2×4 — and the VIVOSUN S425 2×4 is a well-specified example. At 122 x 61 x 152cm, the rectangular footprint gives you enough room to run two to four plants or a decent-sized herb and salad rotation side by side, while still fitting through a standard doorway for assembly. The 600D light-proof oxford construction is a genuine step up from the ultra-budget tier without tipping into premium pricing.
What most buyers overlook about this size is how much easier it makes zoning — you can effectively split the tent into a “light-hungry” end and a “shadier” end simply by where you position the canopy, something a small square tent doesn’t really allow. Aggregated review sentiment for this model and size range consistently flags the observation window and floor tray as genuinely useful rather than gimmicky, while a recurring complaint is that the included tool bag (on some bundles) feels like an afterthought. For anyone who has outgrown a windowsill setup and wants one tent that can comfortably handle “a proper hobby” rather than a single experiment, this is the size to budget for.
Pros:
- ✅ Generous footprint without overwhelming a spare room
- ✅ Rectangular shape allows sensible plant zoning
- ✅ 600D oxford canvas balances durability and price
Cons:
- ❌ Needs more floor space than square 2×2 tents
- ❌ Bundled accessories vary in quality by retailer
Expect to pay in the £120-£170 range for the tent alone — a sensible mid-range anchor purchase that most beginners won’t outgrow for a couple of years.
5. BAY6 Grow Tent 1.0m x 1.0m x 1.8m — best UK-stocked heavy-duty frame
The BAY6 Grow Tent is worth flagging specifically because it’s a UK-based brand with UK stock, which matters more than it sounds like when you’re trying to get warranty support or a replacement part without waiting on an international parcel. At 100 x 100 x 180cm with a 95% reflective mylar lining and heavy-duty metal frame, the spec sheet reads like a mid-premium tent, and the square footprint gives more even light distribution than a long, narrow rectangle.
Based on the build description, the heavier-gauge metal frame is the standout feature here — thin poles are one of the most common failure points reported across the whole grow tent category, since they’re what actually supports the weight of any light or extraction fan you hang inside. What the spec sheet won’t tell you is how much a rock-solid frame changes your confidence about upgrading equipment later; a flimsy frame effectively caps what you can safely hang, while a heavy-duty one leaves headroom to grow into. The lightproof design is a genuine requirement rather than marketing fluff — any light leak during a plant’s dark period can disrupt its natural cycle, so a well-sealed tent is doing real horticultural work, not just looking tidy.
Pros:
- ✅ Heavy-duty metal frame supports more equipment
- ✅ 95% reflective mylar improves light efficiency
- ✅ UK stock simplifies returns and replacement parts
Cons:
- ❌ Square 1m footprint limits multi-row layouts
- ❌ Sits at the pricier end of the mid-range tier
At roughly £130-£190, this is the pick for beginners who want mid-range capability but would rather deal with a UK-based supplier than an overseas one for support.
6. Spider Farmer 3.3×3.3 Grow Tent — best square footprint for multi-plant growing
The Spider Farmer 3.3×3.3 Grow Tent takes the square-footprint logic of the BAY6 above and scales it up: 99 x 99 x 203cm gives genuinely generous headroom alongside a floor area that comfortably handles several containers arranged in a grid rather than a single row. The 1680D thickened mylar canvas and enlarged viewing window put this firmly in the “second tent” or “serious first tent” bracket rather than a casual dabble.
Here’s the honest analysis: a tent this size is only worth the extra cost if you’re actually planning to grow multiple plants concurrently, because a single small plant in a 3.3×3.3 tent is genuinely wasting reflected light and heated air on empty space. Aggregated feedback across grower forums repeatedly highlights Spider Farmer’s odd-size options — including finer-grained sizing than most competitors offer — as a point of difference worth noting, alongside comments that the controller lanyard is a small but appreciated organisational touch. For someone who has already run a smaller tent for a season and knows they want more capacity next, this is a logical, well-specified upgrade rather than an overreach.
Pros:
- ✅ Generous 203cm height for taller canopies
- ✅ Square layout suits multiple containers evenly
- ✅ Thickened 1680D mylar canvas for durability
Cons:
- ❌ Significant floor space commitment
- ❌ Overkill for single-plant or windowsill growing
Typically priced between £160 and £230, this suits an ambitious beginner who has already thought through where in the house a metre-square tent will actually live.
7. AC Infinity CLOUDLAB 733 Grow Tent — best premium build quality and light-sealing
At the top of this line-up sits the AC Infinity CLOUDLAB 733, and the spec sheet reads noticeably differently from everything above it. The 2000D oxford canvas is roughly a third thicker than the mid-range tents on this list, the 22mm poles are meaningfully sturdier than the 18mm standard used across most of the market, and the tent is rated to support far heavier hanging loads — useful once you’re running a proper LED fixture, an inline fan and a filter simultaneously rather than a single light.
What the spec sheet won’t tell you, but the design details make clear, is how much thought has gone into reducing light leaks specifically: front zipper flaps as a second barrier, SBS zippers that don’t jam or gap over repeated use, and a dedicated lightproof cable passthrough for any controller wiring. On paper this means fewer of the small daily annoyances — a torch-bright gap at a seam, a zipper that snags — that beginners on cheaper tents eventually learn to live with. Reviewers and retailers consistently describe the CLOUDLAB range as the tent people buy once they’re tired of replacing budget tents every year or two, which, if accurate, makes the higher upfront cost a long-term-value argument rather than pure luxury. It is, honestly, more tent than most total beginners strictly need on day one — but for anyone who already knows this is a multi-year hobby, it’s worth serious consideration.
Pros:
- ✅ 2000D canvas and 22mm poles far exceed entry tents
- ✅ Multiple light-leak-prevention features as standard
- ✅ High weight capacity for future equipment upgrades
Cons:
- ❌ Premium price well above beginner-tier budgets
- ❌ More capability than a first-time single-plant grower needs
Prices for the CLOUDLAB 733 sit in the £220-£320 range depending on retailer promotions — genuinely justified for a long-term setup, but not the tent we’d recommend as an impulse first purchase.
Top 7 Grow Tents: Detailed Spec Comparison
| Tent | Canvas | Pole Thickness | Window | Best For |
|---|---|---|---|---|
| MELONFARM Mini Grow Tent | 600D mylar | Light-duty | Small viewing panel | Windowsill starters |
| VIVOSUN S223 2×2 | High-reflective mylar | Standard | Observation window | Budget first tent |
| MARS HYDRO 60x60x140cm | 1680D | Standard | View window | Tall, narrow spaces |
| VIVOSUN S425 2×4 | 600D oxford | Standard | Observation window | Veg and herb combos |
| BAY6 Grow Tent | 95% reflective mylar | Heavy-duty metal | Standard | UK support, sturdy frame |
| Spider Farmer 3.3×3.3 | 1680D thickened mylar | Standard | Enlarged window | Multi-plant growers |
| AC Infinity CLOUDLAB 733 | 2000D oxford | 22mm reinforced | Largest zipper window | Long-term, premium setups |
Reading down the pole thickness column tells you almost everything about longevity: the BAY6 Grow Tent and AC Infinity CLOUDLAB 733 both use meaningfully heavier framing than the rest of the field, which is exactly where budget tents tend to fail first under the weight of an upgraded light or fan. Canvas density follows a similar pattern — 600D is perfectly serviceable for a first attempt, but 1680D and 2000D fabrics resist light leaks and general wear noticeably better over repeated seasons. If longevity matters more to you than upfront cost, let this table, not just the price tag, guide the decision.
Indoor Growing Space Planning: Choosing the Right Room and Footprint
Indoor growing space planning is the step most beginners skip, and it’s the one that causes the most regret. Before you buy anything, walk the room you’re planning to use and actually measure it — not estimate it. A grow tent needs its footprint, plus roughly 15-20cm of clearance on the door-opening side, plus enough height above it that a hanging light doesn’t sit right against the canopy.
Ventilation access matters just as much as floor space. Rooms with a window you can crack open, or proximity to a loft hatch for ducting an extraction fan outside, make ongoing climate control dramatically easier than a fully sealed interior room. According to the RHS’s own guidance on artificial lighting for indoor plants, lighting systems are increasingly accessible for home use and don’t require professional-level knowledge to get right — but they do generate heat, and that heat has to go somewhere, which is where room choice starts to matter as much as tent choice. You can read the RHS’s full beginner’s guide to artificial lighting for indoor plants for more detail on light intensity and duration.
Spare rooms, box rooms and understairs cupboards are the most common UK choices, largely because they already have a door that closes and some degree of temperature stability. Garages and sheds look tempting on paper because of the extra space, but they introduce damp and temperature-swing problems that a centrally heated room doesn’t have — something worth factoring in before you commit a tent to an unheated outbuilding over a British winter.
Grow Tent Setup Checklist for Beginners
A grow tent setup checklist saves you from the classic first-week mistake: assembling the frame, hanging the light, then realising the socket is on the wrong wall. Work through this order and you’ll avoid most of it.
- Confirm floor space and clearance — measure the tent’s footprint plus door-swing space before you unbox anything.
- Assemble the frame fully before adding the cover — poles under tension are far easier to true-up without fabric in the way.
- Fit the reflective cover and check every seam — look for gaps at corners where light could leak during dark hours.
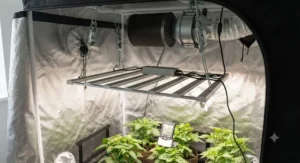
- Position and secure the light, leaving room to raise it as plants grow rather than mounting it at final height immediately.
- Route ventilation and cabling through the sealed ports, not through a gap in the zip, to protect the internal climate.
- Test the full light cycle for 24 hours before adding plants, checking for unexpected light leaks from outside the tent.
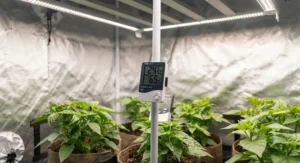
- Set up monitoring — even a basic thermometer/hygrometer combo tells you far more than guesswork ever will.
The single most common first-30-days mistake, based on recurring feedback across grower communities, is overcrowding the tent early — cramming in more containers than the space and light coverage can properly support, which leaves edge plants stretched and undersized. A close second is skipping the 24-hour light-leak test in step six, only to discover weeks later that a neighbour’s security light or a hallway lamp has been quietly disrupting the dark cycle through a gap nobody noticed.
Odour Control System: Keeping Your Growing Space Smell-Neutral
An odour control system isn’t just a nice-to-have if you’re growing anything aromatic — basil, coriander, curry plant and tomato foliage are all surprisingly strong-smelling once you’ve got several plants concentrated in one enclosed space, and the damp, warm air inside a sealed tent will carry that smell into the rest of the house faster than an open windowsill ever would. There’s also the less glamorous source of odour: standing water in a floor tray, or a hydroponic nutrient reservoir left too long between changes, both of which can turn a fresh, earthy smell into a genuinely unpleasant one.
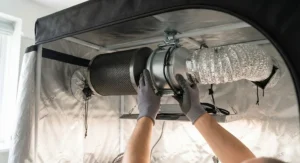
The basic components of an odour control system are an inline extraction fan pulling air out of the tent, a carbon filter attached to that fan to scrub odour particles from the exhaust air, and enough intake ventilation elsewhere on the tent to keep air actually moving rather than stagnating. Sizing the fan to the tent matters more than most beginners expect — an undersized fan won’t turn over the air often enough to prevent musty smells building up, while a wildly oversized one wastes electricity and can dry the space out too aggressively.
Beyond active extraction, good housekeeping does a surprising amount of the work: emptying and rinsing floor trays regularly, not leaving standing water anywhere in the tent, and keeping the humidity in a sensible mid-range rather than letting it climb into the territory where mould becomes a real risk. This isn’t just about smell for its own sake — the NHS notes that damp, poorly ventilated conditions are exactly what allows mould to establish itself and that mould exposure carries genuine respiratory health risks, which is precisely the environment a badly ventilated, humid tent can accidentally recreate. Their full guidance on preventing damp and mould in the home is worth a read even outside the context of indoor growing, since the underlying ventilation principles are identical.
How to Choose a Grow Tent for Beginners
Choosing between seven well-specified tents can feel harder than it should. These are the criteria that actually move the needle, in the order we’d weigh them.
- Measure your actual space first. Every other decision is downstream of the floor area and height you genuinely have available.
- Match footprint to plant count, not ambition. A tent sized for four plants but holding one wastes light and heated air.
- Prioritise canvas density and pole thickness over extra features. A well-built basic tent outlasts a feature-rich flimsy one.
- Check ventilation port count and placement. You’ll need at least one intake and one exhaust route, sealed against light leaks.
- Factor in the room’s existing ventilation and power access, since these constrain the tent as much as the tent’s own spec sheet does.
- Decide your realistic upgrade path before buying, since a slightly bigger tent now can be cheaper than replacing an undersized one in a year.
- Set a total budget that includes the tent, light and extraction, not just the tent, because buying the shell first and improvising the rest is the single most expensive way to build a setup.
What is a grow tent for beginners?
A grow tent for beginners is a compact, light-proof, reflective fabric enclosure — typically 60cm to 120cm square — built around a lightweight pole frame, designed to give first-time indoor growers a sealed environment for controlling light, humidity and airflow without needing to convert an entire room.
Grow Tent vs Open-Shelf Indoor Growing
It’s entirely possible to grow plants indoors on an open shelving unit with a clip-on light and no tent at all, and plenty of people do exactly that. The honest comparison is less about which is “better” and more about which trade-offs suit your situation.
Open-shelf growing wins on upfront cost and flexibility — no frame to assemble, no fixed footprint, and you can rearrange pots freely. It loses badly on light efficiency, though, since without reflective walls a large proportion of your light output simply disperses into the room instead of reaching the plant, and on climate control, since room-wide temperature and humidity swings reach the plants directly with nothing buffering them.
A grow tent for beginners flips both of those trade-offs: the reflective interior means more of your light budget actually lands on the canopy, and the sealed structure keeps humidity and temperature meaningfully more stable than the room around it, at the cost of a fixed footprint and a slightly higher upfront spend on the tent itself. For anyone running more than a couple of plants, or anyone in a home where room temperature swings significantly between day and night, the tent earns its cost back in more consistent, predictable growth.
Common Mistakes When Buying a Grow Tent for Beginners
The same handful of buying mistakes show up again and again across beginner forums and review sections, and most of them are entirely avoidable with a bit of forethought.
Buying on footprint alone, without checking height, is probably the most frequent one — a tent that fits your floor space perfectly but leaves no clearance for a hanging light and a growing canopy becomes a daily frustration almost immediately. Close behind is underestimating ventilation needs, buying a tent with minimal port options and only realising later that fitting an inline fan and filter afterwards is far more fiddly than choosing a tent designed around them from the start.
A third common error is chasing the cheapest possible tent without checking canvas density or pole gauge, which tends to mean replacing the whole thing within a season once a zip fails or a pole bends under a slightly heavier light. And a genuinely underrated mistake is buying a tent sized for ambitions you don’t have yet — a square-metre tent for a single herb plant is not efficient, it’s just empty space consuming heated, humidified air for no benefit.
What to Expect: Real-World Performance in Your First Grow Tent
Specs on a page only tell you so much. In practice, the first week inside a new tent is usually about small calibrations rather than dramatic results: adjusting light height, watching how quickly humidity climbs after watering, and noticing where warm air pools versus where it’s cooler near the vents.
Temperature inside a sealed tent typically runs a few degrees warmer than the room it’s in, purely from the light’s heat output and reduced air exchange — worth checking with a simple thermometer rather than assuming, since a few degrees either way can meaningfully affect growth rate. Humidity behaves similarly: expect it to run higher than open-room readings, particularly straight after watering, and expect it to level out once your ventilation routine settles into a rhythm. None of this is a fault in the tent; it’s simply what a sealed, controlled environment does, and it’s exactly why the odour control and ventilation setup discussed earlier matters as much as the tent itself.
Real-World Scenarios: Which Grow Tent Suits You?
The windowsill upgrader — you’ve been growing herbs on a windowsill for a year and want more consistent results through winter without taking over a whole room. A compact budget tent like the VIVOSUN S223 2×2, running on a modest budget and a small clip light, gives you the light control you’re missing without a big spatial commitment.
The spare-room hobbyist — you’ve got a dedicated spare room and want to run a proper rotation of herbs, salad leaves and maybe a chilli plant or two. The VIVOSUN S425 2×4 or BAY6 Grow Tent both suit this frequency and scale well, giving enough footprint for variety without demanding commercial-level equipment.
The committed multi-season grower — you’ve already run a tent for a year, know your routine, and want capacity and durability that won’t need replacing every season. The Spider Farmer 3.3×3.3 or AC Infinity CLOUDLAB 733 both make sense here, where the higher upfront cost is offset by years of reliable use rather than annual replacement.
Safety, Ventilation & Electrical Compliance Guide
Grow tents combine electrical equipment — lights, fans, sometimes heaters or humidifiers — with a warm, occasionally humid enclosed space, which means basic electrical safety deserves genuine attention rather than an afterthought. Never run a standard indoor extension lead into a space where condensation or splashes are possible, and never daisy-chain multiple extension leads together to power your setup, since overloading is one of the leading causes of extension lead fires in UK homes.
Electrical Safety First, the UK charity dedicated to reducing electrical accidents, publishes clear guidance on this exact issue: check leads and plugs for damage before use, avoid overloading a single socket with multiple high-draw devices, and never run a cable in a way that traps it under carpet or against a heat source. Their full guidance on using extension leads safely is directly applicable to a tent setup running a light, a fan and a filter off one nearby socket. Fit a plug-in RCD adaptor if your socket circuit isn’t already RCD-protected, particularly in any room where humidity might climb during watering.
Beyond electrics, plan for basic fire safety around your lighting — LEDs run cooler than older HID lighting but still generate real heat, and nothing flammable should sit directly against a fixture. Keep the tent zipped when unattended for extended periods and check on the setup regularly, the same way you would with any appliance left running unsupervised.
Long-Term Cost & Maintenance
The tent itself is only the entry fee. Running costs — mainly electricity for lighting and any fans — are what actually determine whether a setup is good value over a full year, and this is where beginners are most likely to underestimate the total picture.
| Cost Factor | Budget Tier | Mid-Range Tier | Premium Tier |
|---|---|---|---|
| Tent cost | Under £110 | £120-£190 | £220-£320+ |
| Typical light draw | 20-45W | 45-100W | 100-200W+ |
| Replacement frequency | 1-2 seasons | 2-4 seasons | 4+ seasons |
| Best For | Testing the hobby | Ongoing dedicated growing | Long-term multi-year setups |
Running a 45W light for 12-16 hours a day adds up to a genuinely noticeable but not alarming sum across a year — and with electricity priced at roughly 26p per kWh under the current energy price cap according to Ofgem’s own unit rate figures, a beginner-tier setup typically costs somewhere in the region of a few pounds a month to run, rising meaningfully with larger, more powerful lighting. The premium-tier tents cost more upfront but, based on their thicker canvas and heavier frame components, are the tier least likely to need full replacement within a couple of seasons — which is the real total-cost-of-ownership argument in their favour, rather than any claim that they’re inherently “better” for a total beginner.
Benefits vs Traditional Windowsill Growing
| Factor | Grow Tent | Windowsill Growing |
|---|---|---|
| Light control | Full control, reflective interior | Dependent on season and orientation |
| Climate stability | Buffered from room temperature swings | Directly exposed to room conditions |
| Upfront cost | Higher (tent + light + ventilation) | Minimal to none |
| Space required | Dedicated footprint | Existing windowsill |
| Best For | Consistent year-round growing | Casual, low-commitment growing |
The table makes the trade-off explicit: windowsill growing wins on cost and simplicity, while a grow tent wins on consistency and control, particularly through a UK winter when natural daylight hours drop sharply. If your goal is a handful of herbs for casual use, a windowsill remains entirely reasonable; if you want predictable, repeatable results across the seasons, the tent’s added cost buys genuine reliability.
Features That Actually Matter (And Those That Don’t)
Marketing copy across this category leans hard on features that sound impressive but rarely change outcomes for a beginner, so it’s worth separating signal from noise. Canvas density, pole thickness and light-sealing quality genuinely matter — they determine how long the tent lasts and how well it does its core job of controlling the internal environment. Ventilation port placement and count matter just as much, since they determine how easily you can fit extraction equipment without compromising the seal elsewhere.
What matters far less, despite prominent marketing, is branded “controller mounting plates” and lanyards on tents aimed at total beginners — genuinely useful once you’re running a multi-device automated setup, but largely irrelevant if you’re hanging a single light and checking on it manually. Similarly, extremely high thread-count claims on canvas beyond a certain point offer diminishing real-world benefit for a first tent; 600D-1680D canvas is perfectly serviceable for most beginner setups, and chasing 2000D+ specs mainly matters once you’re already committed to the hobby long-term.
Frequently Asked Questions
❓ Is a grow tent worth it for a beginner?
❓ What size grow tent should a beginner start with?
❓ Do grow tents smell?
❓ How much electricity does a grow tent use?
❓ Can I put a grow tent in a garage or shed?
Conclusion
A grow tent for beginners doesn’t need to be an intimidating purchase once you break it down into its real components: footprint versus your actual room, canvas and pole quality versus your budget, and ventilation versus your odour and humidity tolerance. Of the seven tents covered here, the VIVOSUN S223 2×2 and MELONFARM Mini Grow Tent suit the cautious first-timer testing the waters, the VIVOSUN S425 2×4 and BAY6 Grow Tent suit anyone ready to commit to a proper spare-room setup, and the Spider Farmer 3.3×3.3 and AC Infinity CLOUDLAB 733 reward growers who already know this is a long-term hobby rather than a passing experiment.
Whichever tent you land on, the setup checklist, odour control system and electrical safety guidance above matter just as much as the tent itself — a well-chosen tent with a badly planned setup still leads to a frustrating first season. Take the time to measure your space properly, size your ventilation to match, and you’ll spend far more time enjoying the growing than troubleshooting the tent.
Recommended for You
- Best Grow Tent 2026: 7 Top Picks
- 7 Best Aluminium Cold Frame Picks for UK Gardens in 2026
- Best Wooden Cold Frame UK: 7 Proven Picks for 2026
Disclaimer: This article contains affiliate links. As an Amazon Associate, I earn from qualifying purchases. If you purchase products through these links, we may earn a small commission at no additional cost to you.
✨ Found this helpful? Share it with your friends! 💬🤗
