In This Article
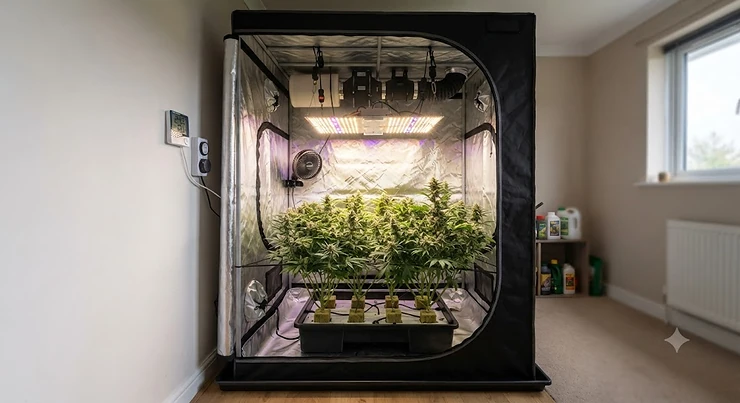
Somewhere between your third YouTube video and your fifteenth open browser tab, you’ve probably realised the same thing every new indoor grower does: a grow tent is not just “a tent.” It’s a climate-controlled little universe you’re building from scratch, and the tent itself is the skeleton everything else hangs off. Get the best grow tent for your space and you’ll spend the next few years fiddling happily with lights and airflow. Get the wrong one, and you’ll be patching light leaks with gaffer tape by week three.
A grow tent is a lightproof, reflective-lined enclosure — usually a fabric skin over a metal pole frame — built to give indoor plants a sealed, controllable environment for light, heat and humidity. Think of it as a pop-up greenhouse that folds down small enough to live in a loft.
We’ve spent time digging through real specification sheets, aggregated review sentiment from Amazon UK and grower forums, and the sort of engineering details manufacturers bury on page four of the product listing. Below, you’ll find seven genuinely different tents — budget, mid-range and premium — plus a proper buying guide covering the reflective mylar lining, ventilation ducting system, and light-proof zipper design details that actually separate a tent that lasts three grows from one that lasts three years. According to the Royal Horticultural Society’s guidance on greenhouse ventilation, good airflow reduces temperature, replenishes the gases plants absorb during growth, and keeps fungal diseases like grey mould at bay — which is exactly why we won’t shut up about ventilation later on.
Quick Comparison Table
| Tent | Footprint | Fabric Density | Best For | Price Range |
|---|---|---|---|---|
| AC Infinity CLOUDLAB 642 | 120x60x180cm | 2000D mylar | Best overall reflectivity | £180-£230 |
| Spider Farmer 4×2 | 120x60x150cm | 1680D Oxford | Best mid-range value | £90-£130 |
| VIVOSUN PRO 2×4 | 60x120x180cm | 2000D Oxford | Best ducting layout | £80-£120 |
| Mars Hydro 4x2x6 | 120x60x180cm | 600D Oxford | Best budget bundle | £65-£100 |
| Gorilla Grow Tent | 120x120cm (adj. height) | Heavy-duty proprietary | Best build quality | £280-£380 |
| Secret Jardin Dark Street | 120x120cm | 210D ripstop | Best European value | £95-£145 |
| Homebox Ambient Q100 | 100x100x200cm | PAR+ canvas | Best for beginners | £115-£155 |
Reading across this table, a pattern jumps out fast: fabric density and price climb together almost in lockstep, but that doesn’t mean the cheapest option is a false economy. The Mars Hydro 4x2x6 proves a lighter 600D canvas can still do the job for a first-time grower who isn’t planning to move the tent every fortnight. Meanwhile, the Gorilla Grow Tent sits well above everything else on price because you’re buying an adjustable height frame and genuinely industrial hardware, not just a bigger sticker price for the same tent. If you’re choosing purely on footprint, note that the Homebox Ambient Q100 and Secret Jardin Dark Street both cover a similar 1m² grow area but take very different approaches to the canvas itself.
💬 Already got a favourite in mind? Check today’s price before it changes — stock and offers shift fast.
Top 7 Grow Tents: Expert Analysis
1. AC Infinity CLOUDLAB 642 — best reflectivity of the whole lineup
The standout here is the 2000D mylar canvas, which AC Infinity says is lab-tested for reflectivity — and on paper, that’s the thickest fabric in this entire roundup. The 2.5cm poles are noticeably chunkier than the 16-19mm poles you’ll find on most tents in this price bracket, which matters more than it sounds: thicker poles flex less under the weight of a hung light and a loaded ducting run, so your canopy stays level as the grow matures. The zipper window is also the largest of the seven tents here, which is a genuinely useful design choice rather than a marketing bullet point, because a bigger window means less unzipping the whole panel just to check leaf colour.
Based on the spec comparison, this tent is aimed squarely at growers who’ve already run a cheaper tent once, got frustrated by sagging poles or patchy reflectivity, and are willing to pay for the fix. Reviewers consistently note that the build feels noticeably sturdier out of the box than sub-£150 alternatives, with particular praise for how flat the mylar sits without the wrinkling that plagues thinner canvases. A recurring theme in aggregated feedback is that the observation window’s zip pull is stiff for the first few uses before it loosens up — a minor niggle rather than a dealbreaker.
Pros:
- ✅ Thickest canvas and poles in this roundup
- ✅ Largest observation window for easy checks
- ✅ Controller mount plate keeps cabling tidy
Cons:
- ❌ Sits at the top of the price range here
- ❌ Stiff zipper needs breaking in initially
Sitting around £180-£230, this is the “buy once” option for anyone who has already worked out that a flimsy tent is a false economy. If your budget stretches, it’s genuinely one of the more defensible premium purchases on this list.
2. Spider Farmer 4×2 — best mid-range value for compatible light kits
Spider Farmer’s 4×2 leans on a 1680D Oxford fabric, which sits comfortably between budget 600D canvases and the thicker 2000D options — a sensible middle ground rather than a corner cut. The cable pass-through ports and controller lanyard are small but genuinely thoughtful touches: the lanyard specifically stops your grow light’s controller dangling and swinging when you’re rummaging inside the tent, which is the kind of detail you only appreciate after you’ve knocked a controller off its hook in a cheaper tent.
What most buyers overlook about this model is that it’s explicitly built to pair with Spider Farmer’s own SE4500 and G4500 light ranges, so if you’re buying light and tent together, the mounting points and cable routing are designed to match rather than being an afterthought. For anyone building a first serious 1.2m x 0.6m footprint on a realistic budget, this is one of the more balanced picks here. Reviewers consistently highlight the enlarged viewing window and removable floor tray as the two features that get used daily, while a smaller number mention the included pole connectors feeling slightly plasticky compared with all-metal alternatives.
Pros:
- ✅ Removable floor tray catches spills easily
- ✅ Controller lanyard stops cable dangling
- ✅ Designed to pair with matching light kits
Cons:
- ❌ Pole connectors feel less premium than metal
- ❌ Standard viewing window smaller than CLOUDLAB’s
Expect somewhere in the £90-£130 range, which puts it firmly in “sensible first serious tent” territory rather than budget-bin pricing.
3. VIVOSUN PRO 2×4 — best ducting layout for tidy airflow
VIVOSUN’s PRO line uses a 2000D Oxford fabric and — the detail that actually matters here — is explicitly built around compatibility with “High CFM” extraction kits, meaning the duct ports are sized and positioned for higher-airflow fans rather than the token vents you get on entry-level tents. The 1-inch poles are thicker than the 16mm standard, giving the frame real rigidity once you’ve hung a light, an oscillating fan, and a full ducting run off it.
Here’s what the spec sheet won’t tell you outright: ducting layout is one of the most underrated differences between grow tents, because a poorly placed port forces you to run ducting at an awkward angle, which reduces airflow efficiency at exactly the bends where CFM loss matters most. On paper, this tent’s port placement — intake low, exhaust high, on opposite corners — follows the negative-pressure principle that most experienced growers rely on for odour and heat control. Aggregated review sentiment on this model is strongly positive around the large observation window and rigid pole system, with a smaller cluster of comments noting the included pole labels (which help you match poles to positions during assembly) wear off faster than they’d like.
Pros:
- ✅ Ports positioned for efficient negative pressure
- ✅ Thick 1-inch poles resist sagging under load
- ✅ Large observation window aids daily checks
Cons:
- ❌ Assembly labels fade faster than expected
- ❌ No bundled light or fan included
Typically priced around £80-£120, this is the pick if ventilation efficiency is your priority over raw canvas thickness.
4. Mars Hydro 4x2x6 — best budget bundle for a first grow
Mars Hydro built its reputation on affordable, bundle-friendly kit, and the 4x2x6 tent reflects that positioning: a 600D Oxford canvas that’s noticeably lighter-duty than the premium options here, but still lined with a reflective interior and finished with a lockable zip. The honest analytical take is that 600D fabric is a genuine step down in abrasion resistance and rigidity compared with 1680D or 2000D alternatives — it’s more prone to sagging over a multi-year lifespan — but for a first tent that might get one or two grows before you decide whether this hobby’s for you, that trade-off is entirely reasonable.
Based on the spec comparison, this tent earns its place through accessibility rather than engineering flex. It’s frequently bought alongside Mars Hydro’s budget LED ranges as a starter bundle, and the frame uses standard interlocking poles that are simple enough for a first-time assembler to manage without instructions open on a second screen. Reviewers consistently report that value for money is the strongest selling point, with a recurring caveat that the canvas can feel thin to the touch compared with pricier tents — worth knowing going in rather than discovering on unboxing day.
Pros:
- ✅ Genuinely low entry price for a full tent
- ✅ Simple pole assembly for total beginners
- ✅ Reflective lining still included at this price
Cons:
- ❌ 600D canvas feels thinner than rivals
- ❌ Less long-term durability under heavy use
Sitting around £65-£100, this is the tent to buy if you want to test the waters before committing serious money to the hobby.
5. Gorilla Grow Tent — best build quality with adjustable height
Gorilla’s signature feature is the patent-pending height extension kit, which lets you physically extend the tent’s roof height rather than being locked into whatever the box says on day one — a genuinely rare bit of engineering in this category. The frame uses 100% metal interlocking connectors rather than the plastic corner pieces common elsewhere, and the doorways offer 360-degree access, meaning you’re not always unzipping from the same fixed side.
What most buyers overlook about this model is that the extendable height solves a real problem experienced growers run into constantly: plants that outgrow a fixed-height tent mid-flower, forcing awkward compromises with light distance or canopy training. On paper, that flexibility alone can justify the premium price if you’re growing anything that stretches significantly during flowering. Reviewers consistently praise the perceived durability of the frame and canvas — several long-term aggregated comments describe years of continuous use without pole failure — though value-conscious buyers note the price gap versus mid-range alternatives is substantial for what is, fundamentally, still fabric on a frame.
Pros:
- ✅ Adjustable height solves mid-grow space issues
- ✅ All-metal interlocking frame connectors
- ✅ 360-degree door access from any side
Cons:
- ❌ Noticeably pricier than every other option here
- ❌ Overkill for casual or occasional growers
Expect a price range around £280-£380, which puts the Gorilla firmly in “serious hobbyist or small commercial” territory rather than casual first-timer spend.
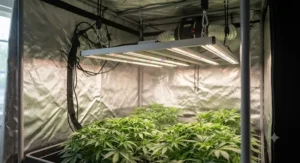
6. Secret Jardin Dark Street — best European value alternative
Secret Jardin’s Dark Street range uses Q195 steel poles and a 210D ripstop canvas — a genuinely different fabric philosophy from the mylar-heavy tents above, prioritising tear resistance over raw reflectivity thickness. Ducting and cable flanges come included as standard, which some rival brands treat as an optional extra, and the tent ships with pre-cut flange holes rather than requiring you to cut your own — though some growers on forums actually prefer cutting flanges themselves for a tighter, more flexible fit around irregular cable runs.
Here’s the honest analytical take: the Dark Street line is positioned as Secret Jardin’s budget tier, meaning a same-size Dark Street tent typically costs meaningfully less than an equivalent Gorilla or premium AC Infinity model, without a proportional drop in day-to-day usability. Reviewers consistently note the poles feel comparable in sturdiness to camping-tent-grade steel — strong without being needlessly heavy — while a smaller cluster of aggregated feedback flags that the reflective interior isn’t quite as bright as dedicated mylar-canvas competitors, a fair trade given the lower price point.
Pros:
- ✅ Includes ducting and cable flanges as standard
- ✅ Tear-resistant 210D canvas holds up well
- ✅ Noticeably cheaper than premium alternatives
Cons:
- ❌ Reflectivity slightly behind dedicated mylar tents
- ❌ Some growers prefer self-cut cable flanges
Priced roughly £95-£145, this is a strong pick for anyone who wants European engineering without paying Gorilla-level prices.
7. Homebox Ambient Q100 — best for beginners in tighter spaces
Homebox takes a genuinely different approach with its PAR+ inner cover — a white reflective lining rather than the silver mylar used almost everywhere else on this list. The brand’s own positioning is that white reflective surfaces spread light more evenly across the canopy and absorb more of the heat a lamp generates, compared with mylar’s more direct, mirror-like bounce. The Q100 footprint, at 100x100x200cm, is also the most compact serious option here, making it a sensible fit for a spare bedroom corner or a tall cupboard rather than a full loft conversion.
What most buyers overlook about this model is that “compact” doesn’t mean “compromised” — the German-engineered construction and beige tear-off canvas are aimed at growers who want a discreet, tidy setup rather than maximum floor space. Based on the spec comparison, this is arguably the best beginner-friendly option on this list precisely because the smaller footprint forces better habits: less canopy to manage, less airflow to balance, and a gentler learning curve overall. Reviewers consistently describe the build quality as reassuringly solid for the size, with a recurring note that first-time buyers appreciate the more subdued, less “gym bag” aesthetic compared with the black nylon look of most rivals.
Pros:
- ✅ Compact footprint suits smaller rooms
- ✅ White PAR+ lining spreads light evenly
- ✅ Discreet, tidy aesthetic versus typical tents
Cons:
- ❌ Smaller footprint limits plant count
- ❌ Premium pricing for the reduced size
Typically found around £115-£155, this is the pick for beginners who value a tidy, manageable first setup over sheer growing capacity.
Practical Usage Guide: Setting Up Your Grow Tent
Getting a grow tent out of the box is the easy part — the first thirty days are where most new growers quietly sabotage themselves. Start by assembling the frame on a flat, cleared surface before you attach the canvas; trying to build poles inside a half-collapsed tent skin is how corners get bent. Once the frame’s up, fit the canvas from the top down, making sure every velcro seam is fully pressed rather than just pinched at the corners — a gap here is your first light leak before you’ve even switched anything on.
Next, mount your extraction fan and carbon filter before the light. It sounds backwards, but running ventilation first lets you dial in negative pressure — where the tent pulls in slightly more air than it pushes out — which keeps smells and excess heat from escaping through zipper seams. A common mistake in the first month is running the fan flat out from day one; instead, use a speed controller and start low, increasing gradually as canopy size and heat load grow. Finally, build a simple weekly maintenance habit: check zip teeth for grit, wipe down the reflective interior if you spot condensation staining, and re-tension any pole connectors that have loosened from vibration.
🔍 Don’t Miss These Exclusive Deals!
Take your indoor growing setup to the next level with these carefully selected tents. Click through to check current pricing and availability, and build a genuinely reliable grow space your plants — and your patience — will thank you for.
Real-World Scenarios: Which Grow Tent Suits You?
The spare-room beginner: budget around £150 total, growing two or three plants for the first time in a converted box room. A compact footprint like the Homebox Ambient Q100 matches the smaller space, and the gentler learning curve of managing less canopy means fewer variables to get wrong in month one.
The upgrading hobbyist: already ran one cheap tent, frustrated by sagging poles and patchy reflectivity, now has £200-£350 to spend and wants something that lasts. This is exactly the buyer the AC Infinity CLOUDLAB 642 or Gorilla Grow Tent are built for — thicker canvas, sturdier frames, and features that solve problems a first-timer wouldn’t yet know to look for.
The budget-conscious tester: genuinely unsure whether indoor growing is a hobby worth investing in long-term, wants to spend under £100 to find out. The Mars Hydro 4x2x6 fits this brief precisely — a real, functional tent without premium-tier spend, so the risk of an expensive mistake stays low.
Grow Tent Buying Guide: How to Choose the Best Grow Tent
Working through a grow tent buying guide properly means looking past the headline size and price and into a handful of details that decide whether the tent still works well in year two.
- Match footprint to your actual light, not your room. Buy the tent size that fits your light’s coverage area, not the biggest space you happen to have free — an oversized tent under a small light wastes canopy edges in low PAR.
- Check fabric density before price. Anything from 600D upward is usable, but 1680D-2000D canvases resist sagging and tearing far better over repeated use.
- Prioritise pole thickness for hung equipment. Thin poles bow under a loaded light rail and fan combination; look for reinforced or metal-interlock designs if you’re hanging heavier kit.
- Count the duct ports and their placement. You need at least one intake and one exhaust, ideally on opposite corners, to support proper negative-pressure airflow.
- Inspect the zipper quality, not just the seams. A light-proof zipper with a decent double-stitched flap matters more long-term than a slightly shinier canvas.
- Factor in assembly complexity. Beginners benefit from labelled poles and simpler connector systems; experienced growers may not care either way.
- Read aggregated review sentiment, not star ratings alone. A 4.5-star average tells you little — recurring specific complaints (sagging, light leaks, zipper failure) tell you everything.
Reflective Mylar Lining: Why It Matters More Than You Think
Reflective mylar lining is the single feature most new buyers glance past on a listing page, yet it does more work than almost anything else inside the tent. The core job is simple: bounce stray light back toward the canopy instead of letting it absorb into black fabric and turn into wasted heat. What the spec sheet won’t tell you is that not all mylar is equal — thickness and finish (diamond-textured versus smooth) both affect how evenly light scatters, with diamond mylar generally diffusing light more uniformly across a canopy edge-to-edge, while smoother mylar reflects more directly but can create hotter, more concentrated bright spots.
On paper, this means a thinner or lower-quality mylar lining can quietly cost you yield at the canopy’s edges even if your light itself is perfectly adequate. Homebox’s white PAR+ alternative approaches the same problem differently, trading some reflective intensity for more even spread and better heat absorption — a genuinely valid engineering choice rather than a lesser one. Reviewers consistently note that visible wrinkling or bunching in the lining, common on cheaper tents, correlates with patchier light distribution reports, which is a useful thing to check for in unboxing photos before you buy. It’s also worth remembering that reflectivity is only half the equation — University of Reading research on indoor humidity points out that maintaining relative humidity broadly in the 40-70% range matters just as much for plant health as how much light is bouncing around the canopy.
Ventilation Ducting System: Getting Airflow Right
A ventilation ducting system is where most first-time growers underspend relative to how much it matters. The tent’s canvas and poles are static once assembled; airflow is the one variable you’re actively managing every single day, and it’s the difference between a tent that stays at a stable 24°C and one that spikes into the high 30s under lights.
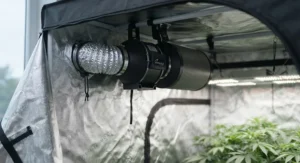
The core setup is straightforward in principle: an inline extraction fan pulls air out through a carbon filter (for odour control) and ducting, while smaller intake ports let cooler air in — creating the negative pressure mentioned earlier. Here’s what most buyers overlook: duct length and bend count matter almost as much as fan power, because every 90-degree bend in flexible ducting reduces effective CFM meaningfully, so a fan rated for your tent size on paper can still underperform once you’ve routed it through three tight corners to reach a window. Common mistakes in the first month include undersized ducting (using 4-inch duct on a filter rated for 6-inch), leaving ducting slack and kinked, and forgetting to insulate ducting runs that pass through cold spaces, which causes condensation to drip back into the tent.
Bringing fresh outdoor air into a sealed space like this doesn’t just cool it down — it replenishes the gases your plants absorb during growth and keeps down fungal diseases like grey mould, proof that this isn’t just a comfort feature but a genuine defence against crop loss. If you’re planning ducting runs near household wiring or need to route power to fans and lights, it’s also worth a quick read of the Health and Safety Executive’s guidance on electrical safety, since extension leads and multi-socket adaptors are one of the most common weak points in home grow setups.
Light-Proof Zipper Design: Stopping Light Leaks
Light-proof zipper design sounds like a minor detail until you’re three weeks into flowering and a stray beam of light through a gap is throwing your plants’ photoperiod off. Most quality tents use a two-layer approach: a standard zip teeth closure, plus an overlapping fabric flap — sometimes velcro-sealed — that physically blocks light from finding a path through the zip’s tiny gaps even when the seal isn’t perfectly flush.
What most buyers overlook about zipper quality is that the zip pull and teeth durability matters as much as the light-blocking flap, because a zip that starts snagging after a few months gets left slightly open out of frustration — which defeats the entire point of the design. On paper, double-stitched zip housings with a wider flap overlap perform noticeably better over repeated daily opening and closing than the single-flap, narrower designs found on the cheapest tents. Reviewers consistently flag stiff zippers as a minor early-use annoyance across nearly every brand in this roundup, but a genuinely persistent snagging issue after the first month is a much stronger red flag worth researching before you buy a specific model.
Common Mistakes When Buying a Grow Tent
The single biggest mistake is buying on footprint alone without checking ceiling height clearance for your light and any planned height extensions — a tent that’s technically tall enough on paper can feel cramped once a light, hanger, and a few centimetres of canopy growth are accounted for. A close second is ignoring duct port count and placement, then discovering after setup that your fan and filter combination physically won’t fit where the ports are positioned.
Buyers also frequently underestimate how much fabric density affects long-term durability, choosing the cheapest 600D option for a setup they intend to run continuously for years rather than the occasional test grow it’s actually suited to. Finally, a genuinely common and easily avoided error is skipping the reflective lining quality check entirely — a wrinkled, low-grade mylar interior in unboxing photos is a reliable early warning sign that shows up in aggregated review complaints about patchy light distribution.
Grow Tent vs a Converted Spare Room or Wardrobe
| Factor | Grow Tent | Converted Spare Room |
|---|---|---|
| Light-proofing | Purpose-built, near-total | Requires blackout modifications |
| Reflective interior | Built-in mylar/PAR+ lining | Needs manual reflective panelling |
| Ventilation ports | Pre-positioned duct ports | Must be improvised or drilled |
| Portability | Fully collapsible | Fixed, permanent conversion |
| Best For | Most home growers | Large-scale or permanent setups |
The comparison above makes the appeal of a dedicated tent fairly obvious for most home growers: every feature a converted room needs bolted on afterwards — blackout, reflectivity, ducting access — comes built in from the first zip. A converted spare room can outperform a tent on raw floor space and can be genuinely cost-effective if you already have reflective panelling and blackout blinds lying around, but for anyone starting from scratch, tents like the Spider Farmer 4×2 or VIVOSUN PRO 2×4 get you to a workable, sealed environment far faster and with none of the DIY light-leak troubleshooting a converted room demands.
Grow Tent Reviews: What Real Growers Actually Say
Pulling together aggregated review sentiment across Amazon UK listings and grower forums reveals a consistent pattern worth knowing before you buy. Positive feedback across nearly every brand here clusters around three things: viewing window size, floor tray durability, and how flat the reflective interior sits without wrinkling. Negative feedback clusters just as consistently around zipper longevity after several months of daily use, and — particularly on budget 600D tents — visible sagging in the roof canvas once a light and hanging hardware are fully loaded.
It’s worth being honest here: individual star ratings vary by listing and change over time, so rather than quoting specific figures that may already be out of date by the time you’re reading this, the more reliable signal is the pattern of what reviewers repeatedly mention, not the number attached to it. If you see recurring, specific complaints about a particular failure point — rather than vague one-off gripes — that’s the detail worth weighing more heavily than the overall average.
Long-Term Cost & Maintenance
The tent’s sticker price is only the opening bid in what you’ll actually spend running it. Budget for replacement duct clips and occasional zip lubricant roughly once a year, plus the very real possibility of replacing a bent pole if the tent gets knocked or moved often — a five-minute, low-cost fix on tents with standard interlocking poles, and a more awkward one on proprietary frame systems. Electricity is the genuinely bigger ongoing line item: based on 2026 projections of around 28p per kWh, running a typical grow light setup for 12 hours a day adds up meaningfully across a month, so factoring running costs into your budget alongside the tent itself avoids an unpleasant surprise on your first energy bill.
Total cost of ownership tips clearly in favour of the thicker-canvas, sturdier-pole options if you’re planning to run the tent continuously for more than a year or two. A £90 budget tent that needs replacing after eighteen months of sagging and zip failure ends up costing more over three years than a £200 tent that’s still performing well at the same point — the classic false economy of buying cheap twice.
Safety, Regulations & Electrical Compliance
Running lights, fans, heaters and humidifiers off a handful of sockets inside a fabric enclosure is exactly the kind of setup UK electrical safety guidance is written for. Keep extension leads fully unwound during use, since a coiled cable reel can overheat under sustained load, and never daisy-chain one extension lead into another. Any socket supplying equipment in a grow tent should ideally sit behind RCD (residual current device) protection, either built into your consumer unit or via a plug-in RCD adaptor, because a faulty humidifier or fan motor inside a humid enclosure is precisely the scenario RCDs exist to protect against.
It’s also worth checking that any product you buy carries a UKCA or CE mark confirming it meets UK electrical safety standards, and giving cabling a quick visual check every few weeks for scorch marks, fraying, or a warm-to-touch feel — early signs worth acting on immediately rather than monitoring. None of this is unique to grow tents specifically, but the combination of moisture, heat and multiple plugged-in devices makes it more relevant here than in an average room, and it costs nothing but five minutes to get right. For a fuller rundown, Electrical Safety First’s guidance on extension leads is worth bookmarking before you wire up a full setup.
Buyer’s Decision Framework
If you’re growing for the first time and unsure you’ll stick with it, choose a budget 600D tent like the Mars Hydro 4x2x6 because the low entry cost limits your risk while you learn. If you’ve already run one grow and know you’ll continue, choose a mid-range 1680D-2000D option like the Spider Farmer 4×2 or VIVOSUN PRO 2×4, because the durability upgrade pays for itself over repeated use. If space is genuinely tight, choose a compact design like the Homebox Ambient Q100 over a larger footprint you’ll struggle to ventilate properly. And if budget isn’t the limiting factor and you want a tent that adapts as your plants grow, the Gorilla Grow Tent‘s adjustable height solves a problem no fixed-height tent can.
FAQ
❓ What size grow tent do I need for 2 plants?
❓ Do grow tents actually block all light?
❓ How often should I replace a grow tent?
❓ Can I use a grow tent in a flat or apartment?
❓ What's the difference between a grow tent and a grow box?
Conclusion
Picking the best grow tent really comes down to matching three things honestly: your available space, how long you expect to keep growing, and how much you’re willing to spend upfront to avoid replacing kit in eighteen months. The AC Infinity CLOUDLAB 642 and Gorilla Grow Tent reward buyers who know they’re in this for the long haul, the Spider Farmer 4×2 and VIVOSUN PRO 2×4 hit a genuinely sensible middle ground most growers will be happy with, and the Mars Hydro 4x2x6 or Homebox Ambient Q100 make sense for smaller budgets or smaller spaces respectively.
Whichever you land on, the details covered here — reflective mylar lining quality, a properly planned ventilation ducting system, and a light-proof zipper design that won’t snag by month two — matter more to your actual results than the headline dimensions on the box. Get those right, and the rest of the grow is genuinely just paying attention.
Recommended for You
- 7 Best Aluminium Cold Frame Picks for UK Gardens in 2026
- Best Wooden Cold Frame UK: 7 Proven Picks for 2026
- Cold Frame for Hardening Off Seedlings: 7 Best UK Picks (2026)
Disclaimer: This article contains affiliate links. As an Amazon Associate, I earn from qualifying purchases. If you purchase products through these links, we may earn a small commission at no additional cost to you.
✨ Found this helpful? Share it with your friends! 💬🤗
