
In This Article
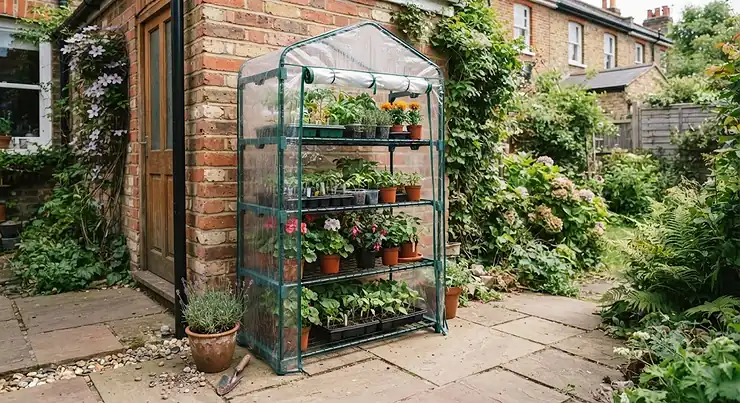
There’s a very specific kind of heartbreak that only balcony and patio gardeners know: the seed tray of tomato seedlings you nursed for six weeks, wiped out overnight by a late April frost because you had nowhere protected to put them. A 4 tier mini greenhouse solves that exact problem, and it does it without asking for a mortgage-sized chunk of garden. Structurally, it’s a vertical steel frame wrapped in a clear plastic cover, stacked with four shelves so you get roughly the growing capacity of a small cold frame crammed into not much more than a doormat’s worth of floor space. Think of it as the difference between renting a studio flat and a proper house — you’re working with less square footage, so every shelf has to earn its keep.
This guide is built for the reality of British gardening: unpredictable weather, small gardens, and a genuine desire to grow something worth eating. We’ll walk through seven real products currently sold in the UK, compare them properly (not just a spec dump), and get into the practical stuff — shelf spacing, anchoring against wind, what to do when the cover finally gives up. According to the Royal Horticultural Society, coldframes and mini greenhouses give tender summer crops like aubergines, tomatoes and chillies a warmth boost in late spring and summer, which speeds up ripening and lifts overall yield — so this isn’t a fringe gardening gadget, it’s genuinely useful kit with backing from the UK’s leading gardening authority.
Whether you’re working a third-floor balcony, a narrow side return, or a proper allotment plot with no room for a full-size greenhouse, there’s a configuration here that fits. Let’s get into it.
Quick Comparison Table
| Product | Dimensions (H×W×D) | Cover Material | Price Range | Best For |
|---|---|---|---|---|
| VonHaus 4 Tier Mini Greenhouse | 158 × 50 × 45cm | Reinforced PVC | £30-£45 | All-rounder for patios |
| Christow 4 Tier Growhouse | 157 × 69 × 45cm | Reinforced PE | £25-£40 | Wider shelf depth |
| Outsunny 4 Tier Widened Mini Greenhouse | 160 × 90 × 49cm | Reinforced PE | £40-£60 | Widest footprint, tomatoes |
| Unibos 4 Tier Mini Greenhouse | 155 × 69 × 49cm | Clear PVC | £25-£35 | Budget indoor/outdoor |
| DIVCHI 4 Tier Wide Greenhouse | 160 × 90 × 50cm | PE with frame | £35-£50 | Value wide-body option |
| Hardys 4 Tier Mini Greenhouse | 160 × 70 × 50cm | Extra-thick PVC | £30-£45 | Toughest standard cover |
| Oypla Growhouse 4-Tier | 130 × 50 × 45cm | PE | £20-£30 | Compact/lowest cost |
Straight away you can see the split: three of these — the Outsunny 4 Tier Widened Mini Greenhouse, the DIVCHI 4 Tier Wide Greenhouse, and to a lesser extent the Christow 4 Tier Growhouse — go wide rather than tall, trading a bit of floor footprint for genuinely usable shelf depth. That matters enormously once you start growing anything with a root ball, like tomatoes or peppers, rather than just flat seed trays. The Oypla Growhouse 4-Tier is the outlier on size, and it’s worth knowing upfront that “compact” here means genuinely tight — brilliant for a doorstep, cramped for anything ambitious.
✨ Ready to compare options properly? Keep scrolling — the full breakdown of all seven is just below.
Top 7 4 Tier Mini Greenhouses: Expert Analysis
1. VonHaus 4 Tier Mini Greenhouse — best all-round balance of price and build
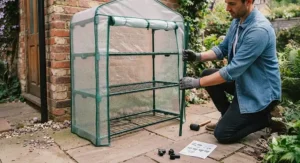
The VonHaus earns its “all-rounder” tag by not being extreme in any one direction — it’s not the widest, not the cheapest, not the toughest cover on the market, but it nails the middle ground better than almost anything else in this list. Standing at 158cm tall with a footprint of 50 × 45cm, it’s built around a powder-coated steel frame with four wire shelves, each rated to hold 8kg. That’s enough for a dozen 9cm pots per shelf without the wire sagging, which is more than a few budget rivals can claim honestly.
Where it distinguishes itself is the reinforced PVC cover, which is noticeably thicker to the touch than the bargain-basement covers bundled with sub-£20 alternatives — the difference matters most in April and May, when a flimsy cover starts flapping and tearing at the seams during a blustery week. The roll-up zip door lets you dial ventilation up or down depending on whether you’re hardening off seedlings or trying to trap heat on a cold snap. This is a solid pick for anyone who wants “just works” over chasing a bargain, and it suits beginners who don’t yet know exactly how demanding their growing habits will become.
Aggregated review sentiment on Amazon UK consistently flags easy, tool-free assembly and sturdy construction as the standout strengths, with the reinforced cover specifically called out as lasting longer than standard alternatives — though a recurring theme in the same reviews is that the structure benefits from being tied down or weighted, particularly in exposed gardens.
Pros:
- ✅ Reinforced cover outlasts standard PVC alternatives
- ✅ Tool-free assembly, genuinely done in under 15 minutes
- ✅ 8kg per-shelf rating handles heavier pots comfortably
Cons:
- ❌ Narrower depth limits root vegetables and larger pots
- ❌ Needs extra anchoring in windy or exposed spots
Expect to pay in the £30-£45 range depending on retailer promotions at the time of research; for the reinforced cover alone, that’s fair value against thinner unbranded equivalents.
2. Christow 4 Tier Growhouse — best shelf depth for the price
The Christow stands roughly 157cm tall but where it earns its spot on this list is the 69cm width paired with a genuinely usable 45cm depth — on paper that’s a modest jump from the VonHaus, but in practice it’s the difference between squeezing pots in edge-to-edge and having enough room to actually rotate a tray for even light exposure. Four reinforced shelves sit inside a powder-coated steel frame, wrapped in a heavier-gauge PE cover than you’d find on entry-level competitors.
What most buyers overlook about this model is that the wider frame footprint also means better wind stability out of the box — a wider base resists tipping more effectively than a tall, narrow tower, all else being equal, which is basic physics rather than marketing spin. It’s a strong option for gardeners who want to grow slightly bulkier plants — courgettes, dwarf beans, or chunkier herb pots — rather than just flat seed trays. Based on the spec comparison against narrower rivals, this is the one to pick if depth matters more to you than height.
Reviewers commonly praise the sturdier feel of the frame compared with lighter-gauge competitors, and several mention the cover holding up well through a full growing season; a recurring criticism is that the zip on the roll-up door can be fiddly to align on first use, though most report it loosening up after a few uses.
Pros:
- ✅ Extra depth suits bulkier pots and trays
- ✅ Wider base improves stability in light-to-moderate wind
- ✅ Heavier-gauge PE resists UV degradation better than thin covers
Cons:
- ❌ Zip door can be stiff to align when brand new
- ❌ Takes up noticeably more floor space than narrow models
Priced in the £25-£40 range at the time of research, it represents strong value for the added shelf depth versus similarly priced narrow-body rivals.
3. Outsunny 4 Tier Widened Mini Greenhouse — widest footprint, best for tomatoes
If you’ve read anything about growing tomatoes in a mini greenhouse, you’ll know the perennial complaint: standard models are simply too narrow once a cordon tomato starts putting on side growth. The Outsunny widened version directly answers that, coming in at roughly 90cm wide against the 45-50cm width typical of the rest of this list — effectively double the shoulder room. The steel frame is powder-coated for corrosion resistance, and the cover is a 140g/m² PE material rated for UV protection, letting through around 85% of available sunlight according to the manufacturer’s own testing.
This is the pick for anyone whose main motivation for buying is specifically growing tomatoes, peppers, or chillies rather than starting flat trays of seedlings — even the smallest, unheated protected structure genuinely extends the UK growing season and lifts crop yields for a wide range of vegetables, according to RHS guidance on greenhouse vegetable growing. The extra width means you can position pots with enough gap for airflow between them, which matters more than people expect — cramped plants in a sealed plastic cover are a recipe for grey mould and whitefly explosions.
Aggregated customer sentiment highlights the noticeably sturdier feel versus the standard-width Outsunny models, with several reviewers specifically mentioning successful tomato crops; a consistent theme in less favourable reviews is that the wider frame requires a flatter, more level surface to sit properly, or the extra width can rock on uneven paving.
Pros:
- ✅ Nearly double the shelf width of standard models
- ✅ 140g/m² PE cover blocks harmful UV while admitting light
- ✅ Genuinely suited to tomatoes, peppers and chillies
Cons:
- ❌ Needs a flat, level base or it can rock
- ❌ Larger footprint won’t suit the tightest balconies
Sitting in the £40-£60 range at the time of research, it’s a premium jump over the standard-width models but a sensible one if tomatoes are the whole point of the purchase.
4. Unibos 4 Tier Mini Greenhouse — best budget indoor/outdoor pick
The Unibos keeps things simple: a powder-coated steel frame, a clear PVC cover, and four tiers designed to slot into balconies, patios, or even a bright spare room without dominating the space. At 155cm tall with a 69 × 49cm footprint, it sits comfortably between the narrow VonHaus-style units and the wider Outsunny model, without chasing either extreme. What most buyers overlook about “budget” mini greenhouses generally is that the frame quality, not the cover, is usually where corners get cut first — the Unibos avoids that particular pitfall by sticking with a genuinely rigid powder-coated frame even at its lower price point.
It’s an especially sensible option for anyone who wants to try mini-greenhouse growing for the first time without committing serious money, or for someone who wants a genuinely portable unit they can bring indoors overnight during a cold snap and back out the next morning. On paper this means slightly less durability against sustained bad weather than the reinforced-cover models above, so it suits fair-weather patio use more than an exposed, permanently outdoor allotment plot.
Real customer reviews consistently describe the assembly as quick and tool-free, with several buyers specifically noting it’s a good “starter” greenhouse for testing the concept before investing in something larger; a recurring complaint is that the standard (non-reinforced) cover is noticeably thinner than premium alternatives and shows wear faster under constant outdoor exposure.
Pros:
- ✅ Genuinely rigid frame despite the lower price point
- ✅ Lightweight enough to move indoors overnight easily
- ✅ Straightforward, tool-free assembly
Cons:
- ❌ Standard cover thinner than reinforced alternatives
- ❌ Less suited to permanent, exposed outdoor placement
At around £25-£35, this is one of the more accessible entry points into 4 tier mini greenhouse growing without sacrificing frame quality.
5. DIVCHI 4 Tier Wide Greenhouse — best value wide-body alternative
The DIVCHI sits in similar territory to the Outsunny widened model — roughly 90cm wide, 160cm tall — but typically undercuts it on price, making it the value pick for anyone who wants the wider growing bays without paying a premium brand markup. The frame and cover follow the now-familiar formula: powder-coated steel poles slotting together without tools, wrapped in a PE cover with a roll-up zip door for ventilation control.
Here’s what the spec sheet won’t tell you outright: wide-body mini greenhouses like this one distribute weight differently to narrow towers, so while they’re more stable against tipping, the horizontal shelf bars can flex slightly more under heavy, unevenly distributed loads — worth bearing in mind if you’re planning to load one side with large pots and leave the other empty. For buyers prioritising value over brand recognition, this is a genuinely competitive option; the core materials and dimensions are close enough to pricier rivals that the savings are difficult to argue against.
Aggregated review themes point to good value for the width offered, with buyers frequently comparing it favourably against pricier wide-body competitors on a pounds-per-centimetre basis; on the downside, a number of reviewers mention the included ground pegs feeling flimsy compared with the frame itself, prompting many to buy sturdier aftermarket anchoring pegs separately.
Pros:
- ✅ Wide shelves at a lower price than comparable rivals
- ✅ Roll-up zip door offers genuine ventilation control
- ✅ Straightforward no-tool assembly
Cons:
- ❌ Included ground pegs are flimsier than the frame quality
- ❌ Shelves can flex slightly under unevenly distributed loads
Typically priced in the £35-£50 range, it’s a strong value contender against the market-leading wide-body brands.
6. Hardys 4 Tier Mini Greenhouse — toughest standard-width cover
Hardys built its reputation in the UK garden accessories market on doing the unglamorous basics well, and this 4 tier model reflects that. At 160 × 70 × 50cm, it sits in the mid-size bracket, but the standout feature is the “extra thick” PVC cover — genuinely noticeable in hand versus the standard covers on cheaper competitors, and it shows in how the panel resists puncturing from an errant bamboo cane or a snagged edge during setup. The reinforced steel frame uses a roll-up zip panel door, the now-standard format across nearly every product on this list.
Based on the spec comparison, the thicker cover material is the single biggest differentiator here rather than any dramatic difference in dimensions or shelf capacity — so this is the pick for anyone who has previously had a mini greenhouse cover fail early and wants insurance against a repeat. It particularly suits gardeners in more exposed sites — coastal gardens, hilltops, anywhere routinely battered by wind and rain — where a standard-weight cover simply doesn’t survive a full season.
Genuine customer feedback repeatedly highlights the cover’s durability as the reason for repeat purchases, with several long-term reviewers reporting multiple seasons of use without tearing; a less common but recurring criticism notes the frame poles can be a slightly fiddly fit on first assembly, requiring a firm push to seat fully.
Pros:
- ✅ Noticeably thicker PVC cover than standard competitors
- ✅ Well suited to exposed, weather-prone gardens
- ✅ Multiple seasons of reported use without tearing
Cons:
- ❌ Frame poles can be fiddly to seat on first build
- ❌ No major size advantage over cheaper standard models
Expect a price in the £30-£45 range, positioning it as a mid-tier option that punches above its weight on cover durability specifically.
7. Oypla Growhouse 4-Tier — smallest footprint, lowest cost
Not every gardener needs four tiers of generous growing space — some just need somewhere frost-free to park a dozen seed trays until the last frost passes, and that’s exactly the niche the Oypla fills. At 130 × 50 × 45cm, it’s noticeably shorter than every other product on this list, and correspondingly the cheapest. The PE cover and steel frame follow the same basic construction as its rivals, just scaled down.
Here’s the honest trade-off: what you lose in height and shelf gap, you gain in genuine portability and the lowest buy-in cost on this list. It’s a sensible pick for propagating seeds and “bringing on” young plants rather than growing anything to full maturity inside it — a role explicitly suited to smaller structures, since cramming a maturing tomato plant into a 130cm-tall unit means it will hit the roof within weeks. For a doorstep, a tight balcony corner, or as a genuinely disposable first purchase to test whether mini-greenhouse growing suits your routine, it does the job without asking for a big commitment.
Aggregated reviews describe it consistently as good value for propagating and short-term seedling protection, with the compact size praised specifically by balcony and flat-dwelling gardeners; the main recurring criticism is that the shelf gaps are tight for anything taller than a standard seed tray, limiting its usefulness once plants start growing upward.
Pros:
- ✅ Lowest price point on this list
- ✅ Genuinely portable and easy to store flat
- ✅ Ideal size for propagating and short-term seedling care
Cons:
- ❌ Shelf gaps too tight for taller, maturing plants
- ❌ Not suited to season-long growing of larger crops
At around £20-£30, it’s the entry point for anyone testing the waters before upgrading to a taller model.
Freestanding Mini Greenhouse vs Lean-To: Which Layout Actually Suits You
All seven products above are freestanding mini greenhouse designs — meaning they stand independently on four legs rather than leaning against a wall or fence. That distinction matters more than it might seem. A freestanding mini greenhouse gives you flexibility to reposition it as the sun tracks through the seasons, which lean-to models simply can’t offer once they’re anchored against a structure. On the other hand, lean-to designs borrow some thermal mass and wind shelter from the wall behind them, often running slightly warmer on cold nights as a result.
For most UK gardens, freestanding wins on pure practicality — you can chase the sun around a small garden, move the unit indoors for a storm, or relocate it entirely if you change your growing plans. Lean-to models make more sense if you have a specific sheltered wall, ideally south or south-west facing, and you’re happy to commit that spot permanently. If you’re renting, or your garden layout shifts year to year (raised beds moved, a shed rebuilt, furniture rearranged), freestanding is the pragmatic choice nearly every time. The trade-off is wind exposure: a freestanding unit in an open, unsheltered spot needs more attention to anchoring than a lean-to tucked against a house wall, which is exactly why the anchoring section below matters so much for freestanding owners specifically.
Best Mini Greenhouse for Tomatoes: What Actually Matters
Tomatoes are probably the single most common reason people buy a mini greenhouse in the first place, and it’s worth being specific about what makes a model genuinely suited to them rather than just adequate. Width is the dominant factor — cordon tomatoes put on lateral growth as they mature, and a narrow 45cm-deep unit forces plants into each other within weeks, creating exactly the airless, humid microclimate that invites grey mould and whitefly. This is precisely why the Outsunny 4 Tier Widened Mini Greenhouse and DIVCHI 4 Tier Wide Greenhouse stand out on this list specifically for tomato growers, over narrower alternatives like the Oypla Growhouse 4-Tier.
Height matters too, though less obviously. Tomatoes are closely related to vines and tend to grow tall, and in a mini greenhouse this can quickly become a problem as they reach the roof — the practical fix is choosing dwarf or bush varieties specifically bred for confined spaces, or being disciplined about pinching out growing tips once plants approach the top shelf. Ventilation is the third pillar: on hot, sunny days a sealed plastic cover can turn into an oven within the hour, so a roll-up zip door you can adjust throughout the day isn’t a nice-to-have, it’s essential for fruit set. Seed packets will usually flag whether a variety suits outdoor growing or genuinely needs a full greenhouse to crop reliably, so checking before you commit to a variety saves a lot of disappointment come August.
Greenhouse Shelf Spacing: Getting It Right for What You’re Growing
Shelf spacing is the detail most buyers never think to check before ordering, and it’s often the single biggest source of post-purchase regret. Most 4 tier models split their total height fairly evenly across four shelves, working out to roughly 35-40cm of clearance per tier on a 155-160cm-tall unit. That’s genuinely tight once you’re growing anything beyond flat seed trays — a standard 9cm pot with a leggy seedling can eat through that clearance faster than people expect, especially through a growth spurt in May.
The practical fix, and one that costs nothing, is reshuffling what goes where. Put your tallest, fastest-growing plants — tomatoes, climbing beans, anything that’s about to shoot up — on the bottom shelf, where there’s effectively unlimited headroom below the next tier up (some designs even let you remove the bottom shelf entirely and use the space as a mini coldframe for young plants). Reserve the top shelf, which usually has the least clearance to the roof of the cover, for flat trays, low-growing herbs, or anything you’re not expecting to gain much height. Middle shelves work best for pricked-out seedlings in modular trays, which have predictable, manageable growth over a few weeks. If you’re specifically shopping around shelf spacing as a priority, the wider-bodied models — Outsunny 4 Tier Widened Mini Greenhouse and DIVCHI 4 Tier Wide Greenhouse — don’t just offer more width, their frames are also typically a touch taller overall, giving marginally more breathing room per shelf than the standard-width competitors.
PE Cover Replacement: When and How to Do It
Every plastic-covered mini greenhouse has a shelf life dictated almost entirely by its cover, not its frame — the steel poles will usually outlast three or four covers if properly stored. As one grower resource notes, replacement covers are available for around £10, and while a well cared-for cover might last three to five years if dismantled and stored away over winter, three seasons is a more realistic average for a cover left up year-round. UV degradation is the main culprit: constant sun exposure makes PVC and PE increasingly brittle, and you’ll typically notice it first at the seams and around the zip, where stress concentrates every time the door is used.
Signs it’s time to replace rather than repair: visible yellowing or clouding that’s cutting down on light transmission, tears longer than a few centimetres (small punctures can sometimes be patched with clear repair tape, but tears tend to run further under wind load), or a zip that’s pulling away from the fabric rather than just sticking. Most of the products on this list use a fairly standard slot-together frame design, which means generic replacement covers sized to match your model’s dimensions will usually fit, even if they’re not sold by the original brand — always double-check the H×W×D measurements against your existing frame before ordering, since a cover that’s even a few centimetres out won’t tension properly. Genuine manufacturer replacement covers cost a little more but guarantee a correct fit and matching zip placement, which is often worth the extra few pounds if you want to avoid a fiddly retrofit.
Mini Greenhouse Anchoring Pegs: Why Wind Is the Real Enemy
Ask anyone who’s owned a mini greenhouse for more than a year and they’ll have a story about waking up to find it three gardens over. It sounds comical until it’s your seedlings scattered across next door’s patio. The core physics problem is straightforward: these structures are light — often under 10kg empty — but present a large, flat surface area to wind, exactly the combination that makes them prone to lifting or toppling. That’s precisely why the Met Office’s guidance on staying safe in strong wind urges households to check for loose items outside the home and plan how to secure them whenever a wind warning is issued — a category any unanchored mini greenhouse falls squarely into. UK storms regularly produce gusts strong enough to lift lightweight garden structures, so treating a forecast wind warning as a genuine prompt to double-check anchoring, rather than background noise, is worth the two minutes it takes.
The included ground pegs on most budget and mid-range models are, honestly, an afterthought — thin wire stakes that work fine in soft flower-bed soil but do almost nothing on paving, decking, or compacted ground. Upgrading to heavier-duty anchoring pegs, ideally galvanised steel ground stakes rated for structures rather than tent pegs, is one of the cheapest insurance policies in gardening. For anyone on paving or a balcony where pegs simply aren’t an option, the alternative is weighting the base tiers with something heavy and low — sandbags, bricks, or purpose-made water-filled weights tucked along the bottom rail. A length of cord tied around the frame at roughly waist height and secured to a wall fixing or heavy planter adds a second layer of security for very little effort, and it’s genuinely worth doing before the first forecast storm of the season rather than after.
🌬️ Want more tips on keeping your setup storm-proof? Check current anchoring accessories and reinforced ground stake kits before the next windy spell hits.
Practical Usage Guide: Your First 30 Days
Getting a new mini greenhouse right in the first month sets the tone for the whole growing season, and most of the common early mistakes are avoidable with a bit of forethought. On assembly day, resist the urge to rush the frame together on uneven ground — a wobble at the base compounds into real instability once the cover and pots are loaded on. Take the extra ten minutes to find, or create, a flat surface, whether that’s a paving slab, decking, or firmly tamped soil.
Once it’s up, don’t load all four shelves immediately. Start with one or two tiers and observe how the unit behaves through a few days of typical weather — does the door zip stay put, does the frame flex noticeably in a breeze, does condensation build up excessively inside. This “settling in” period tells you more about your specific microclimate than any spec sheet ever could. Ventilation is the single most common early mistake: a fully sealed cover on a sunny spring day can spike internal temperatures well past what any seedling can tolerate within an hour, so get into the habit of cracking the door open by mid-morning and closing it again as the afternoon cools. Finally, anchor the unit properly in week one, not after the first scare — see the anchoring section above for specifics. A quick weekly check of the zip, seams, and ground pegs takes under two minutes and catches small problems — a loosening peg, a fraying seam — before they become expensive ones.
Real-World Scenario: Matching the Right Model to Your Situation
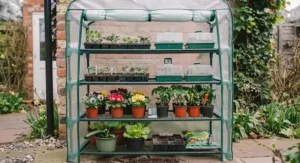
The balcony grower — third-floor flat, south-facing, no garden. Weight and footprint dominate every decision here, and wind exposure is often worse at height than at ground level. The Unibos 4 Tier Mini Greenhouse or Oypla Growhouse 4-Tier suit this profile well: light enough to reposition easily, compact enough not to dominate a small balcony, and easy to bring in through a patio door if a storm warning goes up.
The allotment holder — exposed plot, growing tomatoes and beans for the table, visits twice a week. Durability and width matter more than portability here, since the unit will likely stay in place for the whole season unattended for days at a time. The Outsunny 4 Tier Widened Mini Greenhouse or Hardys 4 Tier Mini Greenhouse, paired with proper anchoring pegs, are the sensible picks — the extra cover thickness and stability buy peace of mind when you’re not there to react to a sudden gust.
The budget-first beginner — small back garden, wants to try growing before committing serious money. Here the priority is a low-risk entry point that still performs adequately. The VonHaus 4 Tier Mini Greenhouse or DIVCHI 4 Tier Wide Greenhouse hit that balance of reasonable cost and genuine usability, giving a realistic first-season experience without a big financial commitment if it turns out mini-greenhouse growing isn’t for you.
How to Choose a 4 Tier Mini Greenhouse
- Decide what you’re actually growing first. Flat seed trays need far less shelf clearance than tomatoes or peppers — match the product to the crop, not the other way around.
- Check the cover material and weight, not just the price. A reinforced PVC or heavier-gauge PE cover costs a little more upfront but typically outlasts a standard cover by a full season or more.
- Measure your actual space, including clearance for the door to roll up. A unit that technically fits can still be unusable if you can’t open the door fully against a wall or fence.
- Factor in your site’s wind exposure honestly. An exposed, elevated, or coastal spot demands a wider base and serious anchoring; a sheltered courtyard has more flexibility.
- Think about width before height. As covered above, width is usually the limiting factor for anything beyond seedlings, so don’t default to the tallest model assuming it’s automatically the most capacious.
- Budget for a replacement cover from day one. Since covers are the wear item, treat the roughly £10-£15 cost of a spare cover as part of the total cost of ownership, not an unexpected extra.
- Read aggregated review themes, not star ratings alone. A 4.2-star average tells you little; recurring specific complaints (flimsy pegs, stiff zips) tell you a lot more about whether a model suits your patience level.
Common Mistakes When Buying a 4 Tier Mini Greenhouse
The single most common mistake is buying on height alone, assuming “4 tier” automatically means generous growing space, without checking the width and depth measurements against what’s actually going in each shelf. A close second is skipping anchoring entirely on the assumption that a “small” structure can’t possibly blow away — as the wind-load physics above make clear, small and light is precisely the combination most vulnerable to lifting, not less.
Buyers also frequently underestimate ventilation needs, treating the roll-up door as a one-time “open in summer, closed in winter” setting rather than something adjusted daily based on actual conditions — this is one of the fastest routes to cooked seedlings on an unexpectedly sunny March afternoon. Finally, plenty of first-time buyers overlook the replacement cover question entirely, only discovering aftermarket covers exist once their original has already failed mid-season — checking cover availability and pricing before purchase avoids an unplanned gap in protection right when it’s needed most.
Long-Term Cost & Maintenance: What You’re Really Signing Up For
The upfront price tag of a 4 tier mini greenhouse is only part of the real cost. Budget for at least one replacement cover over a three-to-five-year ownership period, adding roughly £10-£20 depending on whether you go generic or genuine manufacturer stock. Anchoring pegs, if you upgrade from the flimsy included versions, typically run another £5-£15 for a decent galvanised set. Against those modest ongoing costs, compare the alternative: a proper 6x4ft glass or polycarbonate greenhouse, which the cost-per-use maths simply doesn’t favour unless you’re growing at real volume — a full-size greenhouse represents a far larger capital outlay, needs planning consideration in many gardens, and demands considerably more maintenance in glazing, guttering, and structural upkeep.
For anyone growing on a genuinely small scale — a few tomato plants, a tray or two of herbs, seasonal seedling protection — the total cost of ownership of a 4 tier mini greenhouse over five years, even accounting for a cover replacement or two, comes in a fraction of what a full greenhouse costs to buy and maintain. The ROI case is strongest for anyone currently buying young plants from a garden centre each spring rather than growing from seed — a £3 packet of seeds started under cover regularly produces a dozen or more plants for the price of one or two shop-bought seedlings, and that saving alone can offset the greenhouse’s cost within a season or two.
Features That Actually Matter (And Those That Don’t)
Marketing copy across this category tends to lean hard on numbers that sound impressive but rarely change the growing outcome. UV percentage claims (typically “85% light transmission” or similar) are worth a glance but rarely differ meaningfully between competing products at this price point — they’re more a baseline quality check than a genuine differentiator. Similarly, exact denier or gram-per-square-metre cover ratings matter less in isolation than how the cover actually feels and performs against a fingernail test in the shop or in early reviews.
What genuinely matters: shelf load rating (an 8kg-rated shelf behaves very differently under a row of full pots than a 3kg one), the quality of the zip mechanism (a stiff, poorly seated zip is a daily annoyance for months), and — as covered extensively above — the width-to-height ratio relative to what you’re actually growing. Tool-free assembly is a genuine convenience rather than just a marketing line, since a frame that slots together cleanly also tends to disassemble cleanly for winter storage, extending its working life. Colour, meanwhile, is almost entirely cosmetic — green frames blend into a garden better than white ones, but neither affects performance in any measurable way.
Safety, Anchoring Regulations & Compliance Guide
There’s no specific UK licensing or planning requirement for a freestanding structure this size — mini greenhouses sit well below any threshold that would trigger planning permission concerns, since they’re temporary, unfixed structures rather than permanent garden buildings. That said, general safety guidance still applies. Local authority severe weather advice consistently recommends securing loose garden items, including lightweight structures like mini greenhouses, before a forecast wind warning, and treating any published Met Office wind warning as a genuine prompt to check your anchoring rather than an abstract notice. If you’re in a shared building with a communal balcony or garden, it’s worth a quick check of your lease or building rules before installing anything permanently fixed to a wall, even for a lightweight lean-to bracket.
On material safety, PE and PVC covers used in this category are standard, widely available consumer garden products, but as with any plastic left outdoors, avoid letting a badly degraded, brittle cover shed microplastic fragments into beds where you’re growing food — replacing a visibly failing cover promptly (see the replacement section above) is as much a food-safety consideration as a structural one.
What to Expect: Real-World Performance
On paper, every product in this category promises frost protection and an extended growing season. In practice, a 4 tier mini greenhouse typically buys you somewhere between 2-4°C of frost protection over ambient outdoor temperature on a still night — genuinely useful for pushing sowing dates forward by a few weeks, but not a substitute for a heated propagator if you’re trying to beat a hard frost. On sunny days, expect the opposite problem: internal temperatures can climb 10-15°C above ambient within an hour of full sun with the door closed, which is why daily ventilation management, not the greenhouse itself, ends up being the biggest factor in whether plants thrive or scorch.
Expect visible wear on the cover within the first season if it’s left up year-round in an exposed spot — a bit of fading and stiffening is normal and doesn’t necessarily mean failure. Expect the frame, by contrast, to comfortably outlast several cover cycles if it’s kept away from direct ground contact with damp soil (a paving slab or bit of decking under the feet meaningfully slows corrosion). And expect, realistically, to be adjusting the door and checking the anchoring more often in the first few weeks than you might assume from the product photos — this is hands-on kit, not “set and forget.”
Problem → Solution Guide
Problem: seedlings are leggy and pale. This is almost always a light issue rather than a greenhouse fault — move the unit to the sunniest available spot, and if it’s already in full sun, check the cover for yellowing or clouding that’s cutting light transmission (see the PE cover replacement section).
Problem: condensation is dripping constantly inside. Ventilation is too low for the humidity level. Increase daily door-open time, and consider propping the door slightly ajar overnight rather than fully sealed, especially once temperatures are reliably above freezing.
Problem: the frame is rocking or the whole unit shifted in wind. This is an anchoring failure, not a product fault — revisit the anchoring pegs section above and consider upgrading to galvanised stakes or adding base weights immediately.
Problem: the cover has torn at a seam. Small tears can be patched with clear waterproof repair tape as a stopgap, but seam tears tend to spread under wind load — budget for a replacement cover rather than repeatedly patching through a full season.
Problem: plants on the top shelf are scorching. Heat concentrates near the roof of the cover on sunny days. Move heat-sensitive plants down a tier, or improve top-of-unit ventilation specifically if your model’s door doesn’t reach the uppermost shelf.
Buyer’s Decision Framework
If your absolute priority is lowest cost and smallest footprint, choose the Oypla Growhouse 4-Tier because it minimises both without pretending to offer more growing capacity than it has. If tomatoes or other tall, bushy crops are the whole point of the purchase, choose a widened model like the Outsunny 4 Tier Widened Mini Greenhouse or DIVCHI 4 Tier Wide Greenhouse, because width is the genuine limiting factor for those crops, not height. If your site is exposed to regular wind and rain, choose the Hardys 4 Tier Mini Greenhouse for its reinforced cover, and pair it with upgraded anchoring pegs regardless of which model you pick. If you’re a genuine beginner unsure how committed you’ll be, choose the VonHaus 4 Tier Mini Greenhouse or Unibos 4 Tier Mini Greenhouse for the most forgiving balance of price, ease of assembly, and general usability.
FAQ
❓ What is a 4 tier mini greenhouse used for?
❓ How do you stop a mini greenhouse blowing over?
❓ How long does a mini greenhouse PE cover last?
❓ Can you grow tomatoes in a 4 tier mini greenhouse?
❓ Is a 4 tier mini greenhouse better than a cold frame?
Conclusion
Choosing between these seven isn’t really about finding a single “best” 4 tier mini greenhouse — it’s about matching a specific structure to a specific garden, budget, and growing ambition. The VonHaus 4 Tier Mini Greenhouse and Unibos 4 Tier Mini Greenhouse cover the sensible middle ground for most first-time buyers. The Outsunny 4 Tier Widened Mini Greenhouse and DIVCHI 4 Tier Wide Greenhouse earn their keep specifically for tomato growers and anyone tired of cramped shelves. The Hardys 4 Tier Mini Greenhouse and Christow 4 Tier Growhouse reward buyers in exposed, wind-prone gardens willing to pay a little more for durability, and the Oypla Growhouse 4-Tier remains the honest, no-frills entry point for anyone dipping a toe in before committing further.
Whichever you land on, the details covered here — shelf spacing matched to what you’re actually growing, proper anchoring from day one, and a realistic plan for replacing the cover down the line — will do more for your success than the brand name on the box. Mini greenhouse growing rewards a bit of attentiveness far more than it rewards spending the most money, and a modest, well-anchored, properly ventilated unit will consistently outperform an expensive one left to fend for itself in a storm.
✨ Don’t Miss These Exclusive Deals!
🔍 Take your gardening setup to the next level with these carefully selected products. Click on any highlighted item to check current pricing and availability. These picks will help you create a genuinely productive growing space your family will enjoy all season!
Recommended for You
- Best Mini Greenhouse UK 2026: 7 Tiered & Wind-Resistant Picks
- Greenhouse for Beginners: 7 Brilliant Picks to Try in 2026
- 7 Best Greenhouses UK 2026
Disclaimer: This article contains affiliate links. As an Amazon Associate, I earn from qualifying purchases. If you purchase products through these links, we may earn a small commission at no additional cost to you.
✨ Found this helpful? Share it with your friends! 💬🤗
