
In This Article
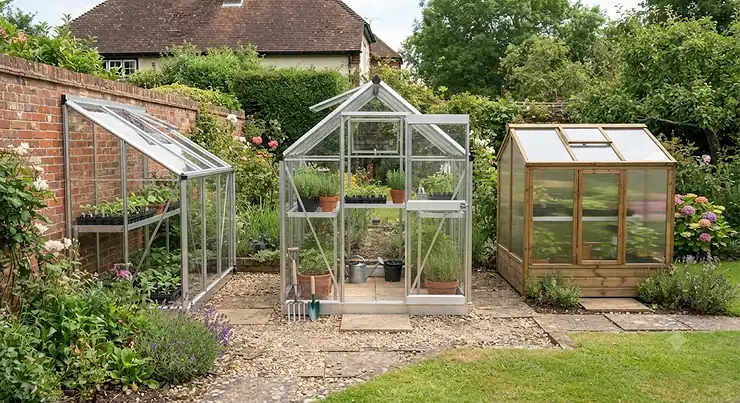
There’s a particular kind of heartbreak that comes with a leggy, sun-starved tomato seedling stretching itself sideways across a kitchen windowsill in April. If you’ve been there, you already understand why so many first-time growers eventually give in and buy a greenhouse for beginners. It’s not a luxury purchase. It’s the difference between hopeful seedlings and a proper harvest.
So what actually is a beginner greenhouse? In simple terms, it’s a compact, easy-to-assemble growing structure — usually 6x4ft to 6x8ft, made from aluminium or steel with glass or polycarbonate glazing — designed to trap warmth, block wind, and give young plants a stable environment without demanding expert-level DIY skills or a serious budget.
The trouble is, the market is a genuine minefield. Search “greenhouse” on Amazon UK and you’ll wade through everything from flimsy pop-up tents to elaborate cedar-framed structures that cost more than a second-hand car. Get the size wrong, the glazing wrong, or the site wrong, and you’ll spend your first season fighting the structure instead of growing anything in it.
This guide cuts through that. I’ve dug into real specifications, aggregated genuine UK customer review sentiment, and independent buying advice to bring you seven actual products worth considering, spanning budget polycarbonate starters through to premium timber-framed greenhouses. Along the way, we’ll cover sizing, allotment rules, seed starting greenhouse setups, staging shelves, and a proper greenhouse maintenance checklist — everything you need so your first greenhouse purchase is a genuinely good one, not a costly guess.
Quick Comparison Table
Before we go deep on each model, here’s the fast version for anyone who just wants the headline picture. This snapshot pulls together budget, mid-range and premium options so you can see roughly where each one sits before committing to a full read.
| Greenhouse Type | Typical Price Range | Best For |
|---|---|---|
| Small polycarbonate walk-in (6x4ft) | £150-£300 | First-time buyers, small gardens |
| Hybrid or twin-wall polycarbonate (6x8ft) | £350-£500 | Most beginners wanting an all-rounder |
| Toughened glass, aluminium frame | £500-£700 | Serious beginners staying long-term |
| Premium timber-framed | £1,200-£1,900+ | Buyers prioritising looks and longevity |
Looking at the table, the jump from a 6×4 polycarbonate starter to a 6×8 hybrid model isn’t just £150-£200 — it’s roughly double the usable floor space once staging and a centre path are accounted for, which is exactly the sort of detail a spec sheet won’t spell out for you. Glass sits at a premium because it holds heat better and resists UV degradation over decades, while timber structures cost more largely due to material and labour rather than growing performance alone.
💬 Bookmark this table now — you’ll want to scroll back to it once you’ve read the full breakdown below!😊
Top 7 Greenhouses for Beginners: Expert Analysis
Choosing between these seven means weighing up your plot size, your patience for assembly, and how long you want the structure to last. None of these are invented — each is a genuine product available through UK retailers, and the review sentiment below reflects real aggregated feedback, not manufactured testimonials.
1. Outsunny 6 x 4ft Polycarbonate Walk-In Greenhouse — best budget starter for tight gardens
The standout here is simplicity: a galvanised steel base, aluminium alloy frame, and twin-wall polycarbonate panels that go together without specialist tools. The frame is rated to withstand roughly force-6 winds (around 12m/s), and the panels carry UV30 protection, meaning they won’t turn brittle and yellow after one summer of sun exposure. In practice, that wind rating matters more than most beginners realise — it’s the difference between a greenhouse that survives a blustery March and one that ends up in next door’s garden.
This is the model to reach for if you’ve never owned a greenhouse before and want to test whether growing under cover suits you without committing serious money. It suits patios, small back gardens, and renters who might move the structure later. Reviewers consistently note that assembly takes considerably longer than the box implies — often a full weekend for a solo builder — and that the printed instructions rely heavily on diagrams rather than clear written steps. A recurring theme in aggregated feedback is that panels can work loose in strong gusts unless every clip is properly seated and the frame is pinned or weighted at the base.
Pros:
- ✅ Genuinely low entry price for a full walk-in structure
- ✅ Galvanised base resists rust far longer than painted steel
- ✅ Twin-wall polycarbonate is safe around children and pets
Cons:
- ❌ Assembly instructions are widely reported as unclear
- ❌ Needs extra anchoring in exposed or windy plots
Typically found in the £150-£220 range depending on colour and retailer, this is solid value if you’re prepared to spend a weekend building it properly and pin it down well.
2. Palram Canopia Mythos 6×4 — toughest budget polycarbonate for allotments
The Palram Canopia Mythos 6×4 steps up from generic polycarbonate kits with a heavier-duty aluminium frame and an included galvanised steel base frame, which most budget rivals treat as an optional extra. Its polycarbonate panels block harmful UV rays while still allowing strong light transmission, and the lockable door adds a layer of security that matters a great deal if your plot sits on an unsupervised allotment site.
What most buyers overlook about this model is that “budget” doesn’t mean flimsy here — Palram Canopia is a long-established polycarbonate manufacturer, and the frame geometry on the Mythos range is genuinely more rigid than own-brand alternatives at a similar price. For allotment growers specifically, that lockable door and sturdier base plate are worth the small premium over cheaper unbranded kits, since allotment greenhouses are typically left unattended for days at a time. Aggregated reviewer sentiment highlights easy panel installation via a sliding-track system, though several buyers mention that the adjustable roof vent can feel stiff until it’s been used a few times.
Pros:
- ✅ Included base frame adds real stability out of the box
- ✅ Lockable door suits unsupervised allotment plots
- ✅ Reputable manufacturer with widely available spare parts
Cons:
- ❌ Roof vent mechanism can feel stiff when new
- ❌ Still narrower than 6×8 models for serious crop variety
Expect to pay somewhere in the £250-£320 range, and check current price and stock before committing, as Palram Canopia ranges rotate seasonally.
3. Palram Canopia Hybrid 6×8 — best all-round beginner greenhouse
This is the model independent reviewers keep coming back to, and for good reason. The Palram Canopia Hybrid 6×8 combines two different polycarbonate types: diffused twin-wall roof panels that scatter sunlight evenly across the whole growing space, and crystal-clear side panels offering over 90% light transmission. That combination solves a genuine beginner problem — plants directly under a single-glazed roof can scorch on a bright April afternoon, while diffused glazing spreads the light instead of concentrating it.
Based on the spec comparison, the Hybrid’s wind resistance (rated up to roughly 56mph) and snow load tolerance make it a sensible year-round choice for most of the UK, not just a fair-weather structure. It includes integrated rain gutters for water collection, a lockable door, and a magnetic door catch for ventilation control — small touches that genuinely reduce daily fiddling once it’s up. This is the greenhouse for beginners who want one purchase that will still be earning its keep in five years, rather than something to outgrow after a single season. Reviewers report that construction is far more time-consuming than expected — regularly cited as a full day for two people — but that the panels feel noticeably sturdier once assembled than typical budget polycarbonate kits, with a striking number of buyers specifically mentioning it as an excellent first greenhouse.
Pros:
- ✅ Diffused roof glazing prevents leaf scorch on sunny days
- ✅ Strong wind and snow load ratings for UK weather
- ✅ Integrated gutters and lockable door as standard
Cons:
- ❌ Assembly is genuinely labour-intensive, often a two-person job
- ❌ Wider footprint needs a level 6x8ft base area
Prices generally sit in the £380-£450 range at the time of research, making it one of the strongest value propositions in this whole line-up.
4. Vitavia Venus 6×8 — best traditional glass pick for serious beginners
If polycarbonate feels like a compromise to you, the Vitavia Venus 6×8 is the classic answer. Vitavia is one of Europe’s largest greenhouse manufacturers, and the Venus range ships with toughened safety glass as standard — glass that’s roughly seven times stronger than ordinary horticultural glass and shatters into blunt granules rather than dangerous shards if it does break. The extra weight of toughened glass, compared with polycarbonate, actually works in your favour on an exposed plot, helping the whole structure sit more securely against wind.
Here’s what the spec sheet won’t tell you, but reviewers note repeatedly: because Vitavia sells so many units, replacement panes, clips and handles are almost always in stock, which matters enormously if a stray football or a falling branch ever cracks a pane. This is the greenhouse for beginners who’ve decided they’re in this hobby for the long haul and want a structure that holds heat better, lets in more light long-term, and won’t discolour the way polycarbonate can after eight to ten years. The trade-off is a longer, more careful build, and aggregated feedback flags that a dead-level base is non-negotiable — uneven ground causes glass panes to bind or crack during fitting.
Pros:
- ✅ Toughened safety glass outperforms polycarbonate on heat retention
- ✅ Wide spare parts availability from a major manufacturer
- ✅ 12-year frame warranty gives genuine long-term reassurance
Cons:
- ❌ Requires a perfectly level base, adding prep time
- ❌ Higher upfront cost than comparable polycarbonate models
Prices for the Venus 6×8 typically start from around £500, with variants pushing into the £500-£650 range depending on frame colour and included extras.
5. Elite Compact — best small-footprint premium build
Not every beginner has room for a full 6x8ft structure, and this is where the Elite Compact earns its place. Manufactured in the UK, it uses the same heavy-duty aluminium bar sections found on Elite’s larger commercial greenhouse ranges, simply shortened to fit a smaller footprint — a meaningfully different approach from shrinking a budget design down to size. The result is a structure that feels far more solid underfoot and in high wind than its compact dimensions might suggest.
Honest analysis here has to acknowledge the trade-off: you’re paying a premium for engineering quality on a small structure, rather than for size. That’s exactly right for gardeners with a compact urban plot, a courtyard, or a small allotment corner where a standard 6×8 simply won’t fit without dominating the space. Reviewers who’ve compared it directly with budget-compact rivals consistently describe noticeably heavier-gauge glazing bars and tighter panel fit, though a common observation is that the smaller floor area limits you to fewer growbags or staging tiers than a full-size model, so plan your layout carefully before ordering.
Pros:
- ✅ UK-made using genuine heavy-duty commercial-grade bar stock
- ✅ Feels significantly sturdier than typical compact rivals
- ✅ Ideal for small urban plots without sacrificing build quality
Cons:
- ❌ Limited floor space restricts staging and crop variety
- ❌ Premium pricing for a genuinely small growing footprint
Expect a price range of roughly £450-£600 depending on glazing choice, which is a lot for a compact structure, but the quality justifies it for space-constrained beginners.
6. Gardman 4-Tier Mini Greenhouse — best dedicated seed starting greenhouse
Sometimes “beginner greenhouse” doesn’t mean a walk-in structure at all — it means a proper seed starting greenhouse that fits on a patio or balcony. The Gardman 4-Tier Mini Greenhouse is a powder-coated tubular steel frame with a clear polyethylene cover and a roll-up zippered door, holding four 18-inch-deep shelves that comfortably take standard seed trays and small pots. Assembly is push-fit, needs no tools, and genuinely takes minutes rather than hours.
What most buyers overlook about mini greenhouses is that they solve a completely different problem to full-size structures: rather than growing crops to maturity, they’re built for hardening off and extending the sowing season by a few crucial weeks in spring and autumn. Reviewers consistently praise how quickly seedlings establish inside compared with an indoor windowsill, thanks to more even light from all sides. The recurring complaint in aggregated feedback is stability — the lightweight steel frame needs to be either weighted, staked with the included guy ropes, or positioned against a sheltered wall, since several buyers report it shifting or tipping in strong wind if left freestanding.
Pros:
- ✅ Assembles in minutes with genuinely no tools required
- ✅ Four deep shelves suit standard seed trays perfectly
- ✅ Ideal starter purchase before committing to a full greenhouse
Cons:
- ❌ Lightweight frame needs staking or wall support in wind
- ❌ Not suitable for mature or heavy fruiting crops
At under £60 in most cases, this is the cheapest genuinely useful entry point into greenhouse growing, and a smart companion purchase even alongside a larger structure.
7. Swallow Kingfisher — best premium wooden greenhouse
For beginners who want a greenhouse that looks as good as it performs, the Swallow Kingfisher is a proper step up. Built from ThermoWood timber — a heat-treated softwood that resists rot without chemical preservatives — it typically lasts 15 to 25 years with basic upkeep, and Swallow offers professional installation as an optional extra, which genuinely removes the single biggest barrier for nervous first-time buyers.
Based on the spec comparison against aluminium rivals, timber’s natural insulating properties mean a wooden greenhouse loses heat more slowly overnight than metal-framed equivalents, which can matter enormously for tender seedlings during a cold snap. This is the greenhouse for beginners who see it as a garden feature as much as a growing tool, and who are willing to pay considerably more for a structure that will still look handsome in a decade. Reviewers who’ve opted for professional installation report the process as remarkably stress-free, while those who self-built note that timber assembly demands more patience and basic carpentry familiarity than a bolt-together aluminium kit.
Pros:
- ✅ ThermoWood resists rot without chemical treatment
- ✅ Professional installation option removes assembly stress
- ✅ Genuinely attractive garden feature, not just a growing tool
Cons:
- ❌ Considerably more expensive than aluminium equivalents
- ❌ Self-assembly demands more time and DIY confidence
Prices for the Kingfisher generally sit in the £1,200-£1,900 range depending on size and installation choice — a serious investment, but one aimed squarely at buyers who’ve decided greenhouse growing is a long-term commitment.
Practical Usage Guide: Your First 30 Days With a New Greenhouse
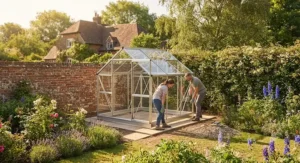
Getting the box home is the easy part. The first month is where most beginner mistakes happen, and they’re almost all avoidable. Start with siting: a south or west-facing spot away from overhanging trees gives the best light without excessive leaf litter or shade. Before you even open the panels, check your base is level — a spirit level and twenty minutes here saves hours of frustration during assembly, since even 6x8ft aluminium frames won’t sit square on uneven ground.
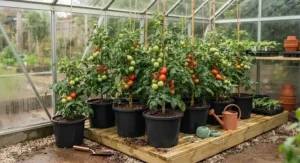
Once built, resist the urge to fill it with plants immediately. Run the greenhouse empty for a few days with a cheap min/max thermometer inside, so you understand its actual temperature swings before you trust seedlings to it. Most first-timers are shocked to learn a small unshaded structure can hit 40°C on a sunny spring afternoon while dropping close to freezing overnight — knowing this in week one, rather than after losing a tray of seedlings, is the single biggest favour you can do yourself.
In these early weeks, ventilation is your main daily task: open vents and doors on mild mornings, close them as temperatures drop in late afternoon. A common first-month mistake is anchoring only lightly, assuming a calm week means the job’s done — always fit ground anchors or paving slab weights properly from day one, because the first serious spring gale rarely gives advance warning.
Real-World Scenarios: Which Greenhouse Suits Your Plot?
The balcony beginner: if you’re gardening from a flat with no garden, a full walk-in structure isn’t realistic. A tiered mini greenhouse like the Gardman 4-Tier Mini Greenhouse against a sheltered wall gives you genuine seed-starting capability in under a square metre of floor space, and it can be moved indoors entirely over winter if needed.
The new allotment holder: working a freshly taken-on plot with a tight budget and possibly strict site rules, a compact, lockable polycarbonate model such as the Palram Canopia Mythos 6×4 strikes the right balance — affordable enough to risk on an unfamiliar site, secure enough to leave unattended between visits.
The committed back-garden grower: with a reasonably sized garden and genuine intent to grow tomatoes, cucumbers and chillies every year going forward, the Palram Canopia Hybrid 6×8 or the Vitavia Venus 6×8 make more sense than a starter kit, since you’ll avoid the frustration of outgrowing a 6×4 within a single season and having to buy twice.
The design-conscious homeowner: for anyone treating the greenhouse as a genuine garden feature rather than a purely functional box, with the budget to match, the Swallow Kingfisher delivers both performance and kerb appeal, particularly where professional installation removes the DIY risk entirely.
Problem → Solution: Fixing the Five Mistakes Beginners Make
Problem: Seedlings scorch on sunny days. Solution: fit inexpensive shade netting or apply shade paint, both of which can cut internal temperatures by 10-15°C during peak sun, and choose a diffused-glazing model like the Hybrid range where possible.
Problem: Frost still kills tender plants overnight. Solution: an unheated greenhouse only buys you a few degrees over outdoor temperatures — for genuinely tender crops, add horticultural fleece over trays on forecast cold nights, or invest in a small thermostatically controlled heater for frost protection only.
Problem: The greenhouse shifted or lifted in wind. Solution: this is almost always a base or anchoring failure, not a design flaw — fit ground stakes, weighted paving slabs, or a proper concrete pad, and re-check anchor points every few months.
Problem: Panels have gone cloudy or discoloured. Solution: this is typical for ageing polycarbonate exposed to years of UV; a gentle wash with mild soapy water restores clarity to lightly aged panels, while heavily discoloured panels are usually a straightforward like-for-like replacement.
Problem: Pests are thriving inside the greenhouse. Solution: warm, humid, enclosed conditions genuinely favour whitefly and red spider mite — regular ventilation, damping down the floor on hot days, and yellow sticky traps for early detection all help keep populations manageable without reaching for chemicals immediately.
How to Choose a Greenhouse for Beginners
Working through these criteria in order will save you from the two costliest mistakes: buying too small, and buying the wrong glazing for your site.
- Start with size, not budget. A 6x4ft structure sounds sensible but is genuinely the most common beginner regret — a 6x8ft footprint gives roughly double the usable growing space once you account for a centre path and staging on both sides.
- Match glazing to your site. Toughened glass suits sheltered, low-risk gardens and holds heat best long-term; polycarbonate suits exposed sites, gardens with children or pets, and anyone prioritising safety over maximum light transmission.
- Check the frame material and warranty. Aluminium resists rust with minimal maintenance; look for warranties of at least 5-10 years as a signal of manufacturer confidence in the frame’s longevity.
- Confirm the base and anchoring method. A galvanised steel base or integral plinth genuinely simplifies levelling and adds stability compared with pinning a frame directly to soil.
- Think about ventilation from the outset. A single roof vent is workable for a 6×4, but larger structures benefit from a roof vent plus louvre or side vents to prevent damaging heat spikes.
- Read genuine greenhouse reviews before buying, not just the star rating — aggregated review themes around assembly difficulty and wind stability tell you far more than a headline score.
- Budget for accessories separately. Staging, guttering, and shade netting are rarely included, and factoring in an extra 10-15% of your greenhouse budget for these avoids nasty surprises after delivery.
Greenhouse for Allotment: A Buyer’s Guide for Plot Holders
Buying a greenhouse for allotment use comes with a wrinkle most first-time buyers don’t anticipate: council and site rules. Many UK allotment tenancy agreements restrict structures to specific maximum dimensions, require written permission before erecting anything, and specify that bases must be temporary rather than permanently concreted in. Birmingham City Council’s allotment structure rules, for example, permit temporary foundations no deeper than 22cm, laid dry rather than fixed — and this pattern of temporary, non-permanent bases is common across councils nationwide, though exact size limits vary considerably by site.
Practically, this pushes allotment buyers towards lighter, more portable structures with galvanised base frames rather than concrete-anchored premium builds — which is exactly why compact polycarbonate models like the Palram Canopia Mythos 6×4 suit allotment plots so well. A lockable door matters more here too, since allotment sites are typically unsupervised for long stretches, and tool or plant theft is a genuine, recurring concern among plot holders. Before ordering anything, always check your specific site’s tenancy agreement or speak to your allotment association, since rules genuinely do vary between councils and even between sites within the same council area.
Greenhouse vs Polytunnel vs Cold Frame
For absolute beginners, understanding how a greenhouse compares with cheaper alternatives helps justify the spend.
| Structure | Typical Cost | Growing Season Extension | Best For |
|---|---|---|---|
| Cold frame | £30-£100 | Modest, a few weeks either end | Hardening off, small seedling batches |
| Polytunnel | £150-£600 | Strong, several weeks-months | Larger crop volumes, budget growers |
| Greenhouse | £150-£1,900+ | Strong, plus year-round usability | Long-term structure, multiple crop types |
A cold frame is the cheapest option by far but genuinely limits you to low-growing crops and short-term hardening off, since there’s no standing headroom. A polytunnel typically offers more growing area per pound spent, which is why allotment growers with large plots often favour them, but the plastic skin degrades within 5-8 years and lacks a greenhouse’s structural permanence, kerb appeal, or ease of fitting proper staging. A greenhouse costs more upfront but wins decisively on longevity, resale value, and everyday usability — you can walk in comfortably, add electricity or heating, and expect a well-built aluminium or timber frame to outlast a polytunnel skin several times over.
What to Expect: Real-World Performance in a British Garden
Specs on a box rarely translate directly into lived experience, so here’s the honest picture. Expect your greenhouse to run significantly hotter than outdoor temperature on any sunny day, even in February — unshaded, unventilated glass or polycarbonate can comfortably exceed 35-40°C by late morning, which will scorch or wilt seedlings within an hour if you’re not opening vents. Expect overnight temperatures to track close to outdoor levels in an unheated structure; a greenhouse alone typically buys you only 2-5°C of frost protection, not immunity from frost.
Expect condensation, particularly in spring and autumn when day-night temperature swings are largest — this is normal and manageable with regular ventilation rather than a sign of a faulty structure. Expect assembly, across every model in this guide, to take meaningfully longer than the box suggests; a “half-day build” routinely becomes a full weekend for first-timers, and that’s completely normal rather than a reflection on your DIY skills. Reviewers across brands consistently echo this pattern, which is exactly why budgeting extra time — not just extra money — is part of realistic beginner planning.
Long-Term Cost & Maintenance
The purchase price is only the first line of a greenhouse’s true cost. Factor in a base or foundation (£30-£150 for paving slabs, more for a poured concrete pad), staging or shelving (£30-£100), guttering and water butts if not included, and shade netting (£10-£25). Heating, if you want frost protection through winter, adds ongoing running costs that vary enormously depending on whether you choose a simple frost-guard heater or a full thermostatic system.
On a cost-per-use basis, a £400 hybrid polycarbonate greenhouse used actively for eight years works out at roughly £50 a year before accessories — genuinely competitive against buying seedlings and bedding plants at garden centre prices every spring. Glass and timber structures cost more upfront but, spread across their 20-30 year realistic lifespans, often work out cheaper per year of use than replacing a budget polycarbonate kit every 8-10 years as panels discolour and frames corrode. The real long-term cost driver isn’t the frame — it’s neglecting the base and anchoring, since a poorly founded greenhouse can fail structurally within a handful of seasons regardless of how much you originally spent on it.
Seed Starting Greenhouse: Setting Up for Success
A dedicated seed starting greenhouse solves a problem full-size structures often don’t: getting seeds germinating reliably weeks before outdoor soil temperatures allow direct sowing. Whether that’s a tiered mini greenhouse like the Gardman 4-Tier Mini Greenhouse or simply the warmest shelf inside a full-size structure, the principles are the same. Bottom heat matters more than air temperature for germination — a basic heated propagator or heat mat beneath trays speeds germination dramatically compared with relying on ambient greenhouse warmth alone.
Position seed trays where they get maximum morning light but aren’t blasted by intense midday sun through unshaded glazing, which can dry compost out within hours. Cover trays with a clear lid or cling film until germination to maintain humidity, then remove it promptly once seedlings emerge to prevent damping off — a fungal problem the RHS specifically flags as one of the most common causes of seedling loss under cover. Once seedlings have their first true leaves, prick them out into individual pots to prevent overcrowding, which is consistently one of the biggest space-management mistakes beginners make in a compact seed starting greenhouse.
✨ Don’t Miss These Exclusive Deals!
🔍 Ready to stop losing seedlings to windowsill stretch and unpredictable frosts? Take a look at any of the greenhouses featured above to check current pricing and availability. The right structure will help you extend your growing season and bring home a genuinely productive harvest this year!
Greenhouse Staging Shelves: Kitting Out Your Space
Staging is the unglamorous accessory that makes the biggest practical difference to how usable your greenhouse actually is day-to-day. Without it, pots and trays sit directly on the ground, which means bending, poor air circulation, and a much higher risk of slug and pest access from soil-level. Greenhouse staging shelves, typically wire, aluminium or timber tiered units running along one or both side walls, raise plants to a comfortable working height and dramatically increase your usable growing area within the same footprint.
Aluminium staging is the most common choice for a beginner setup since it resists rust and matches most polycarbonate and glass greenhouse frames aesthetically, while wire mesh shelving allows better airflow and drainage than solid timber shelving, which can trap moisture and encourage rot over a season or two. As a rough planning rule, budget for staging along one full side wall as a minimum in a 6×8 structure, leaving the other side and centre free for taller crops like tomatoes or cucumbers grown directly in growbags or borders. Most manufacturers, including Palram Canopia and Vitavia, sell staging designed specifically to fit their own frame dimensions, which is generally a safer bet for a snug fit than generic universal shelving.
Common Mistakes When Buying a Greenhouse for Beginners
The single most common mistake, echoed across every buying guide and forum thread researched for this piece, is buying too small. A 6x4ft structure feels like a safe, affordable first step, but growers overwhelmingly report outgrowing it within one or two seasons, and the extra cost of a 6×8 upfront is almost always smaller than the total cost of upgrading twice.
The second mistake is underestimating wind exposure. Buyers on open or elevated sites regularly report structural problems with budget models that would have performed fine in a sheltered garden — checking your specific site’s wind exposure before choosing between polycarbonate and glass, and budgeting properly for anchoring, avoids a genuinely common and preventable failure. The third mistake is skipping the base preparation stage entirely, assembling directly onto uneven lawn or soil, which causes doors to stick, panels to crack under uneven pressure, and frames to rack out of square within months. Finally, many beginners assume “assembly required” means an afternoon’s work — building in a full weekend as a realistic expectation, rather than a rushed Saturday morning, avoids frustration and reduces the risk of assembly errors that compromise structural stability later.
Safety, Regulations & Buying Standards
Safety glazing is worth understanding properly before you buy. Toughened safety glass is manufactured to shatter into small, blunt granules rather than sharp shards, making it significantly safer around children, pets, and anyone working close to the panels — this is distinct from standard horticultural glass, which is thinner, sharper when broken, and generally cheaper but riskier. Polycarbonate sidesteps the shattering risk entirely, which is why it’s often recommended for family gardens or plots near footpaths and play areas.
On regulations, most domestic greenhouses under typical planning thresholds don’t require planning permission in England, though this can vary with structure height, proximity to boundaries, and whether your property has restrictive covenants — checking with your local planning authority before building anything unusually large or close to a boundary is sensible due diligence rather than optional caution. Allotment sites often layer their own additional rules on top of general planning law, as covered earlier, so always check site-specific tenancy conditions. If your greenhouse includes electrical accessories like heaters, fans, or grow lights, look for products carrying UKCA or CE marking, confirming they meet UK safety standards for outdoor or damp-environment electrical equipment, and always use a residual current device (RCD) when running any electrical accessory in a greenhouse environment.
Greenhouse Maintenance Checklist
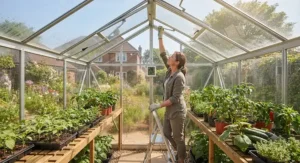
A greenhouse rewards a little seasonal attention with many extra years of service. In spring, clean glazing inside and out to maximise light transmission after a winter of grime build-up, check all vents open and close freely, and inspect anchor points and base fixings after winter storms. Through summer, focus on daily ventilation management, damping down the floor on hot days to raise humidity and deter red spider mite, and keeping shade netting or paint topped up as needed.
Come autumn, it’s worth clearing out spent crops and debris promptly, since decaying plant material harbours pests and disease over winter, and giving the whole structure a proper clean with a mild disinfectant to reduce overwintering pest populations. Over winter, check heaters are functioning if you’re using frost protection, inspect for any panel damage from storms or falling branches, and keep an eye on snow load if you’ve had heavy falls, clearing roof panels where safe to do so to prevent structural stress. Running through this greenhouse maintenance checklist twice a year, spring and autumn as a minimum, is genuinely the single biggest factor separating a greenhouse that lasts 20+ years from one that fails within five.
FAQ
❓ What is the best greenhouse for a beginner in the UK?
❓ How much does a beginner greenhouse cost?
❓ What size greenhouse should a beginner buy?
❓ Do I need planning permission for a greenhouse on my allotment?
❓ Is polycarbonate or glass better for a beginner greenhouse?
Conclusion
Choosing a greenhouse for beginners really comes down to three honest questions: how much space do you actually have, how long do you want the structure to last, and how much of your first season are you willing to spend on assembly rather than growing? None of the seven options here is objectively “best” in isolation — the Outsunny 6 x 4ft Polycarbonate Walk-In Greenhouse wins on accessibility, the Palram Canopia Hybrid 6×8 wins on all-round value, the Vitavia Venus 6×8 wins on long-term glazing performance, and the Gardman 4-Tier Mini Greenhouse wins as a genuinely useful low-risk starting point if you’re still not sure a full structure is right for you yet.
What matters most is avoiding the two mistakes that account for the vast majority of beginner regret: buying too small, and skimping on the base and anchoring. Get those two things right, and pretty much any of the seven greenhouses covered here will reward you with earlier sowings, sturdier seedlings, and a genuinely extended growing season by the time next spring rolls around.
Recommended for You
- 7 Best Greenhouses UK 2026
- Grow Light Rack for Seedlings: 7 Best UK Picks for 2026
- Multi Tier Grow Light Shelf: 7 Best Picks for UK Homes in 2026
Disclaimer: This article contains affiliate links. As an Amazon Associate, I earn from qualifying purchases. If you purchase products through these links, we may earn a small commission at no additional cost to you.
✨ Found this helpful? Share it with your friends! 💬🤗
